Drag and drop your photos/folder to create a project
2
Manage Projects
Rename Project
Delete Project
Add photos to existing projects
Drag and drop photos to a project
Edit project to add photos
3
Explore Editing Options
Portrait Presets & History
Edit Controls
Bottom Menu
4
Presets
Recommended presets
Create Preset
Share Preset
Import presets
5
Batch editing
Sync edits
Apply Presets
6
Export
Export Photos
Check progress
Evoto Workspace
Your photos and albums live in the workspace. By creating projects here, you can organize your work easily and make edits quickly.
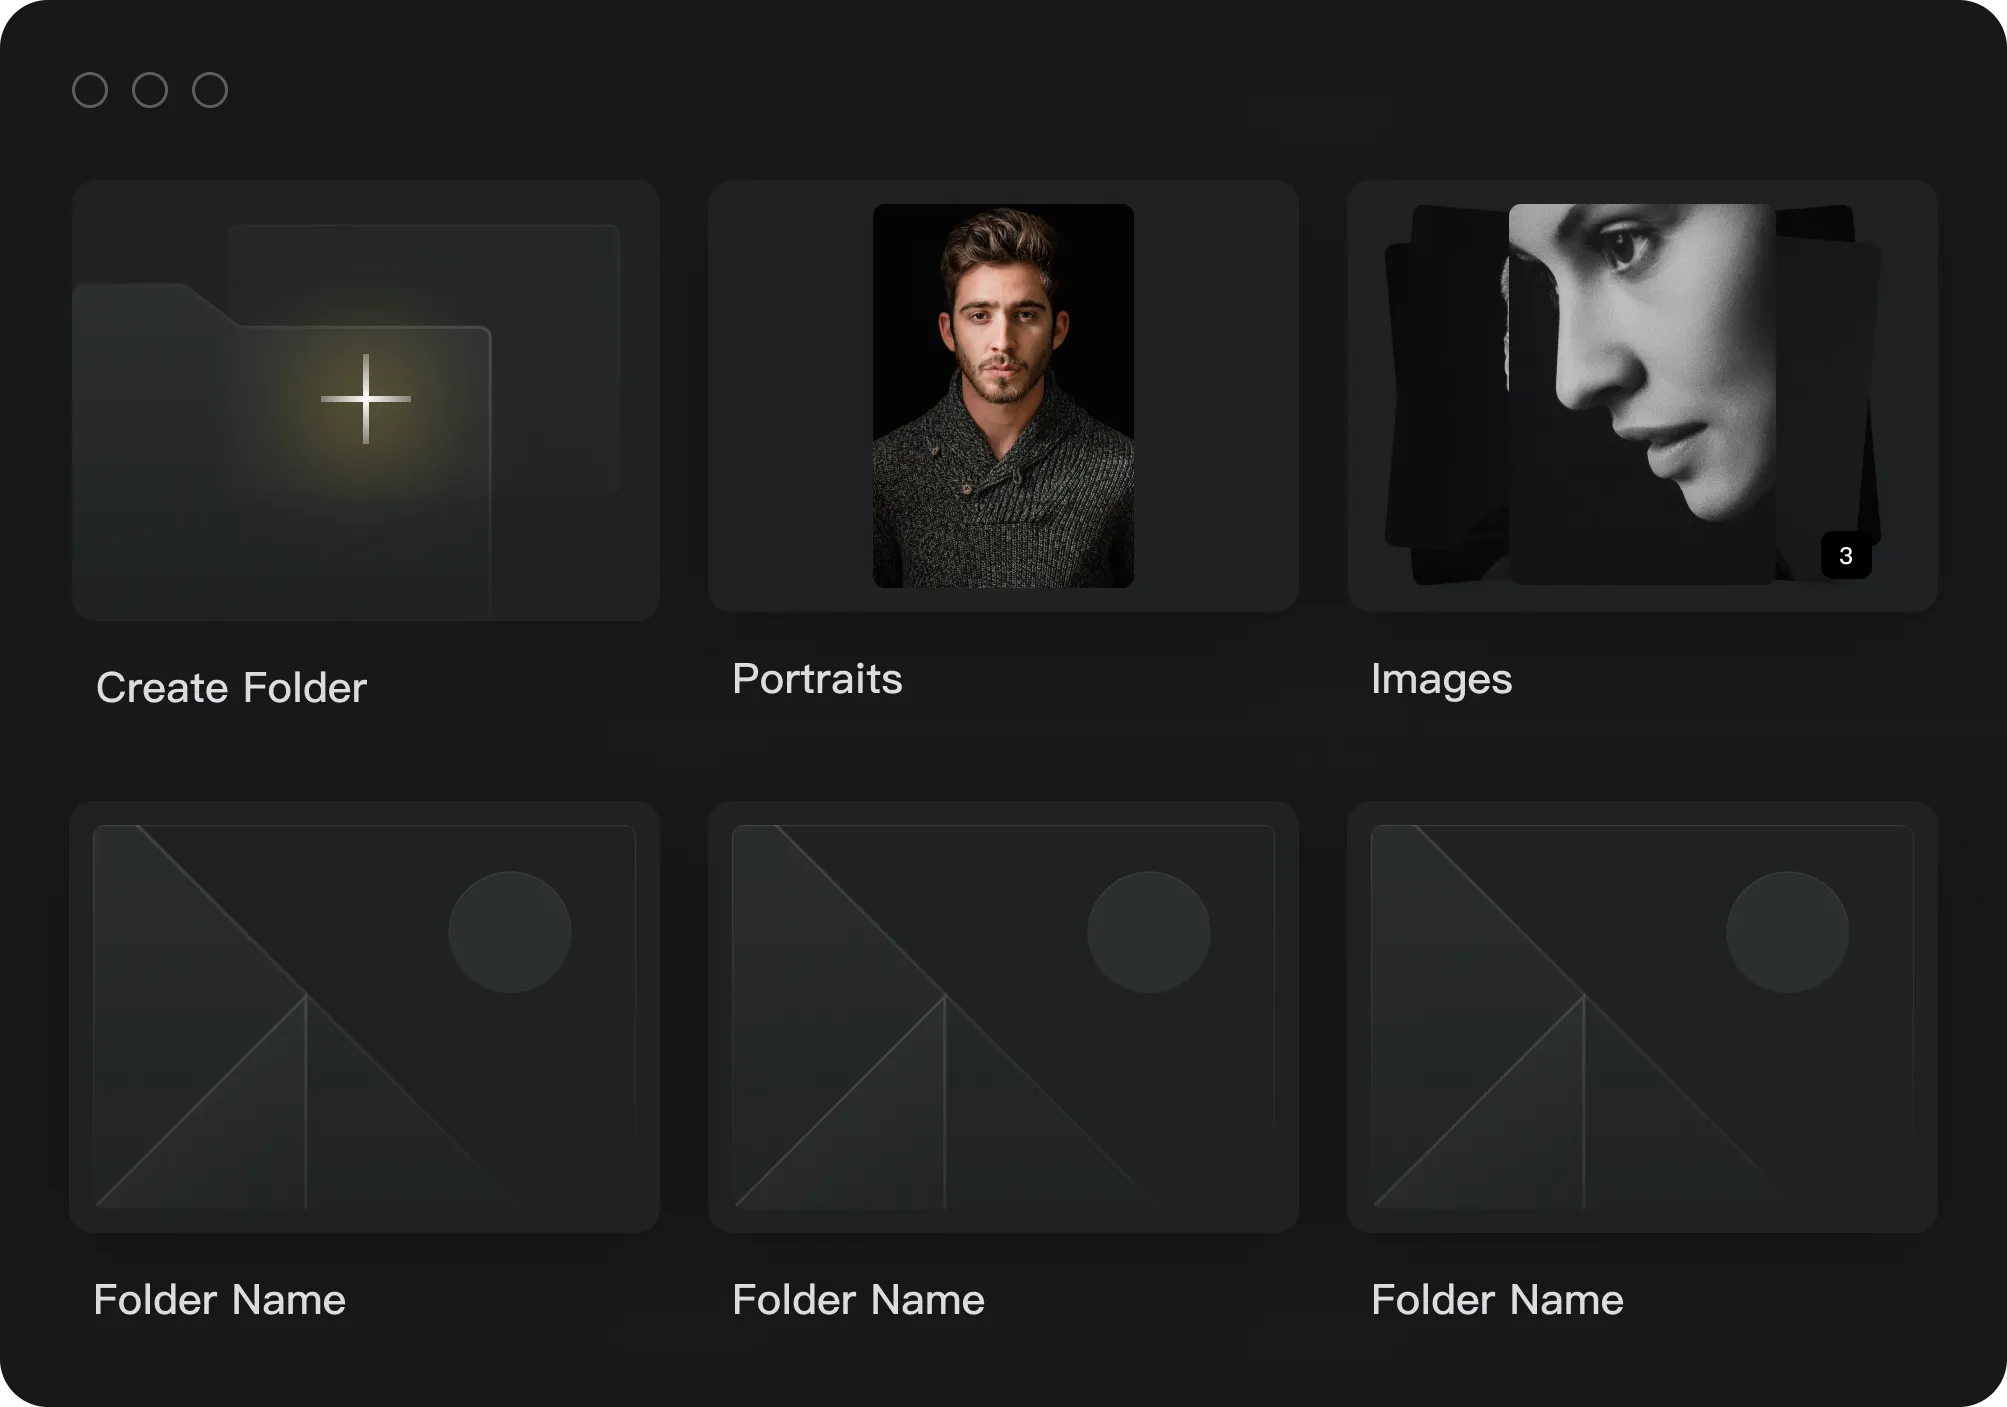
Create new project in your Evoto workspace
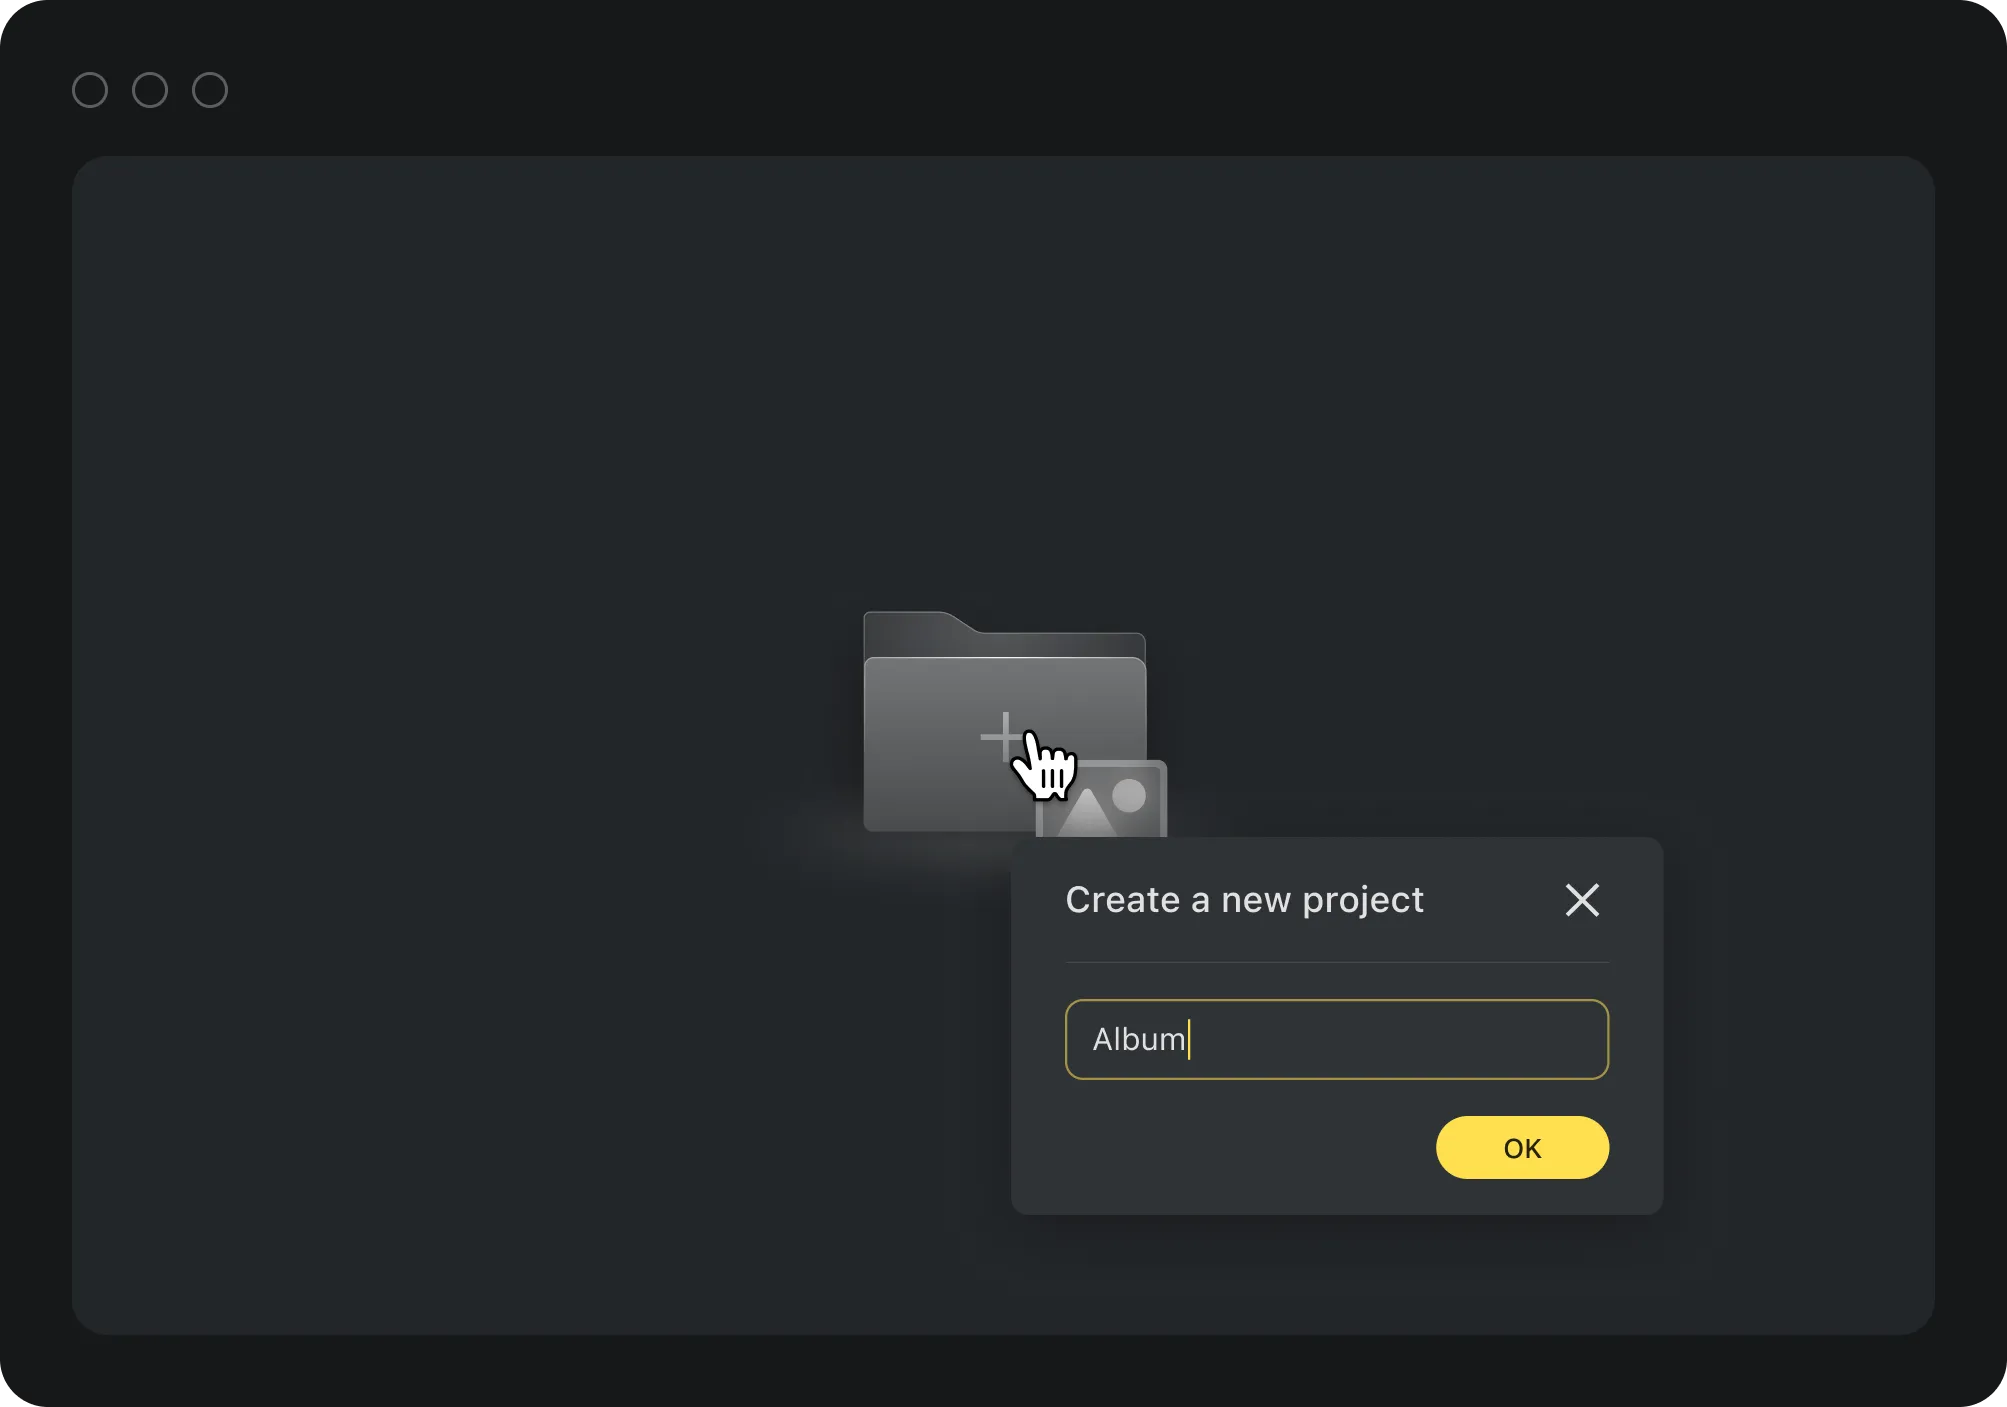
a. Enter Workspace > Click "Create Project"b. Input a project namec. Click "+" to import photos or folders
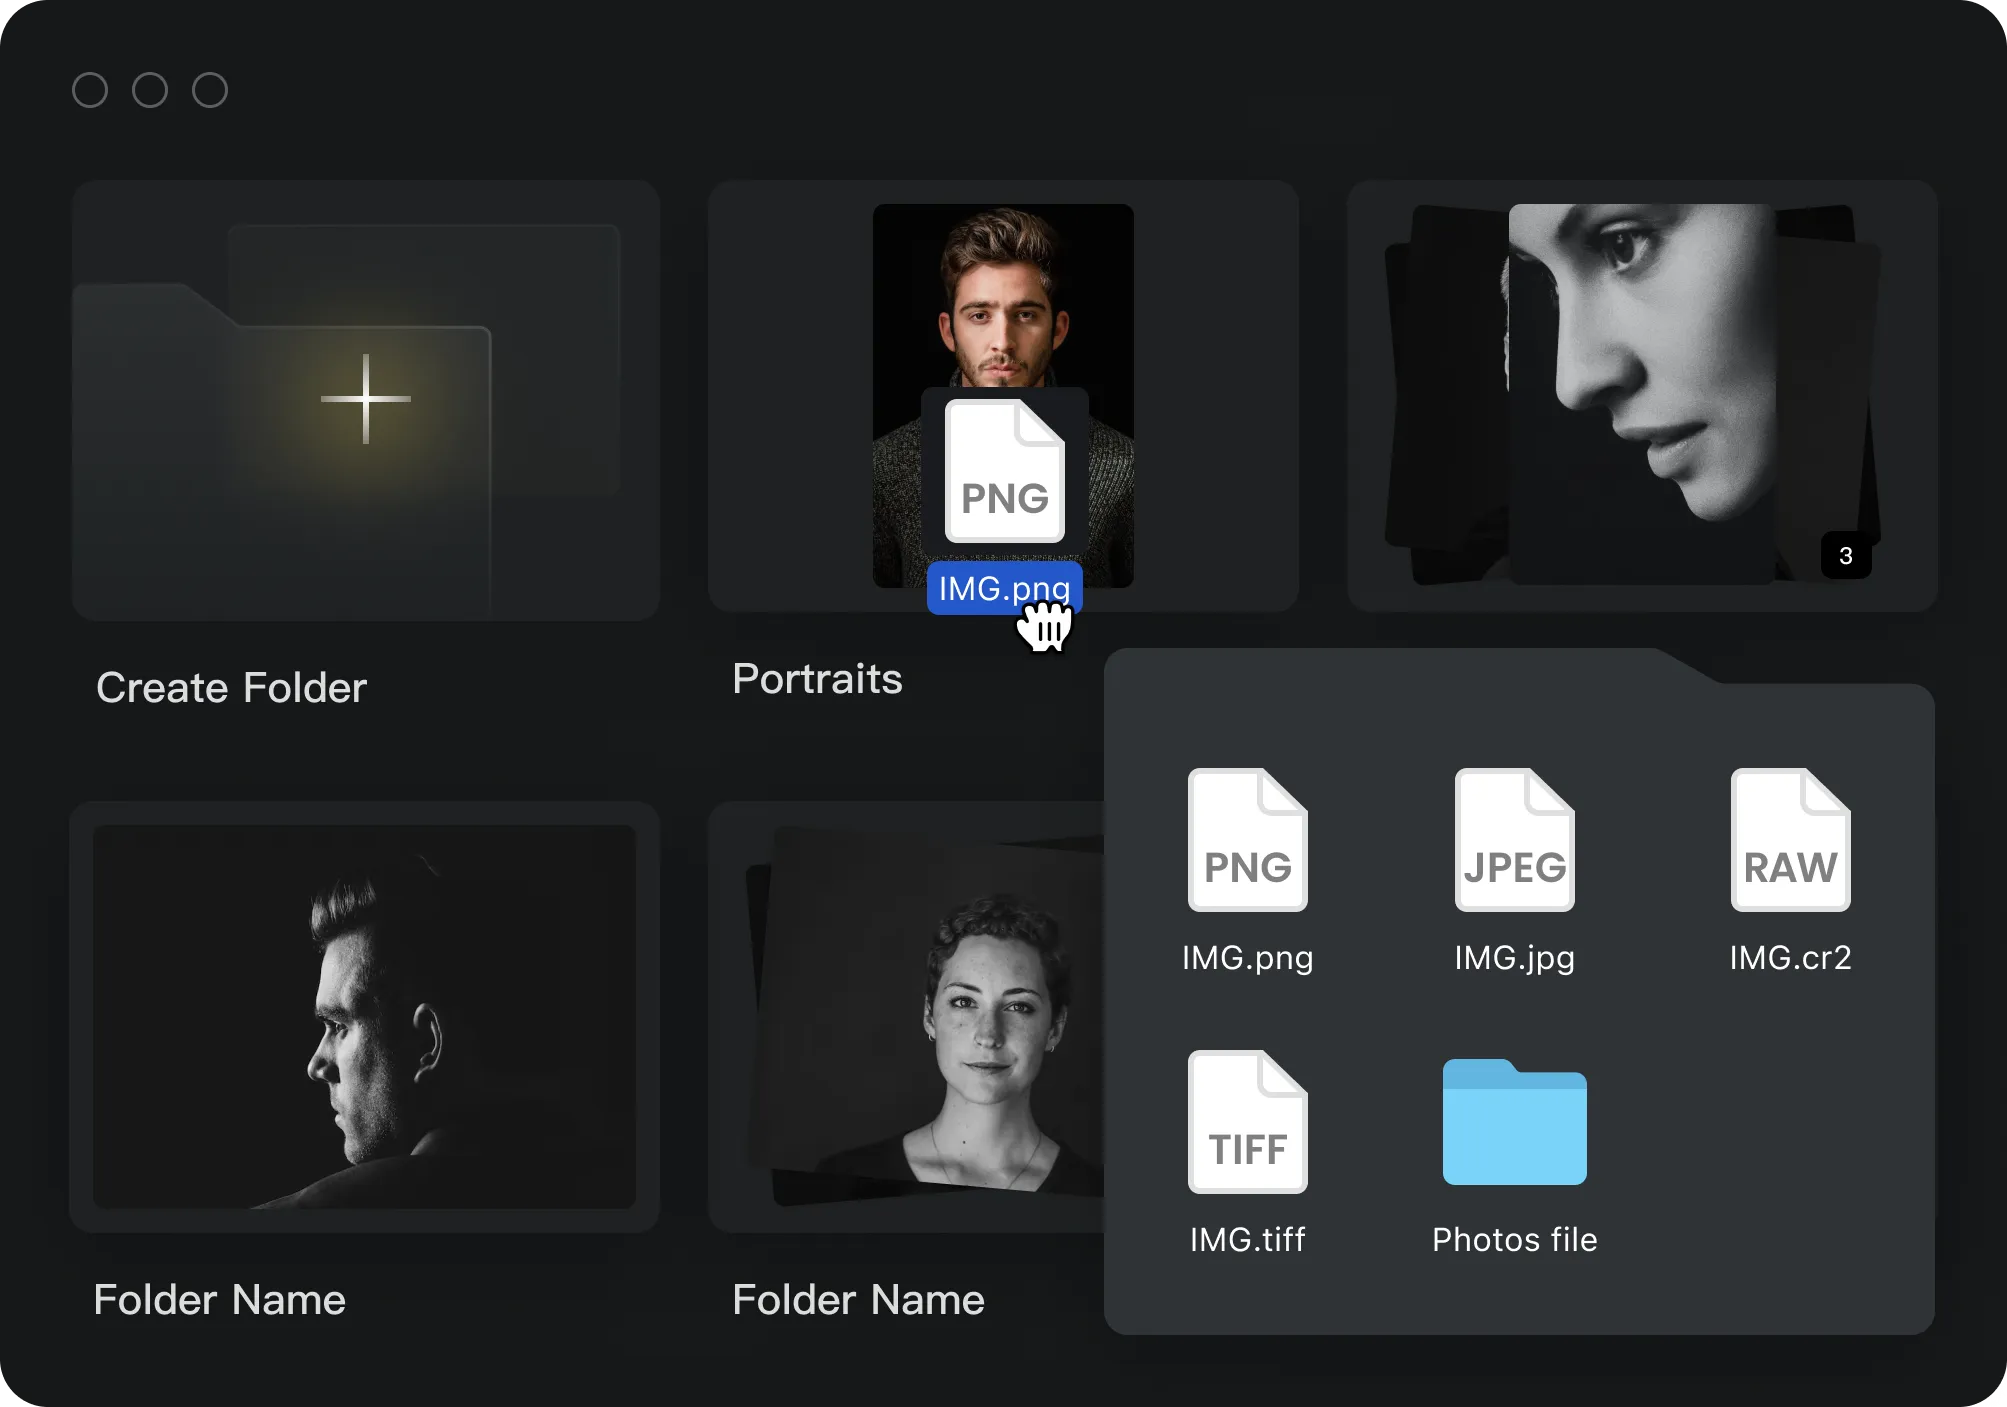
Drag and drop your photos/folder to create a project
a. Select the photos or folders you want to importb. Open your Evoto Workspacec. Drag and drop your photos or folders into your Workspace to create a new project
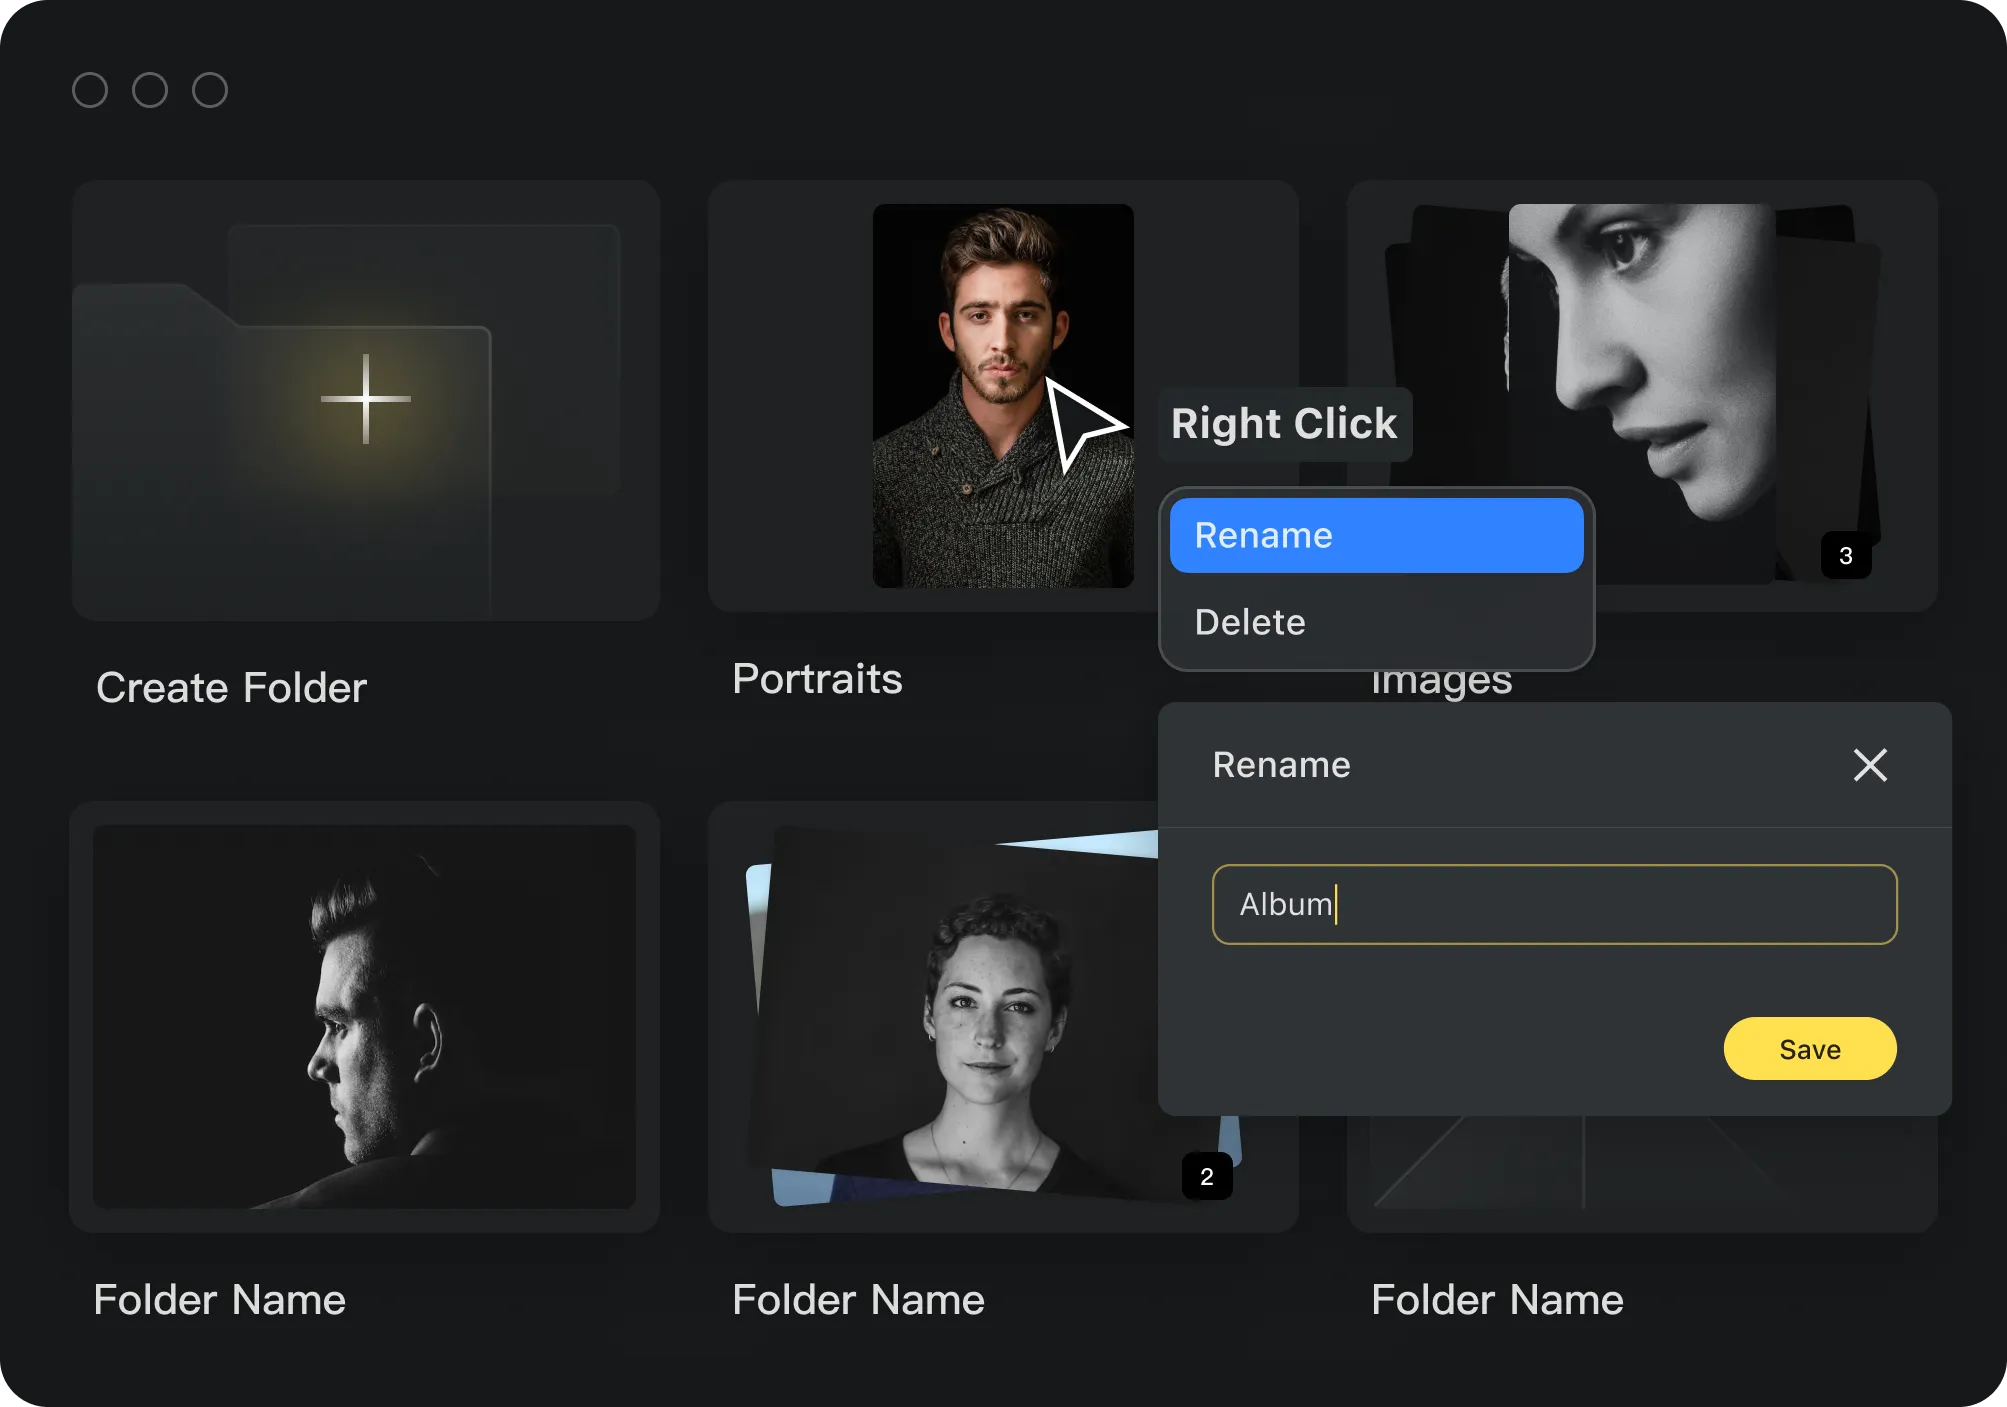
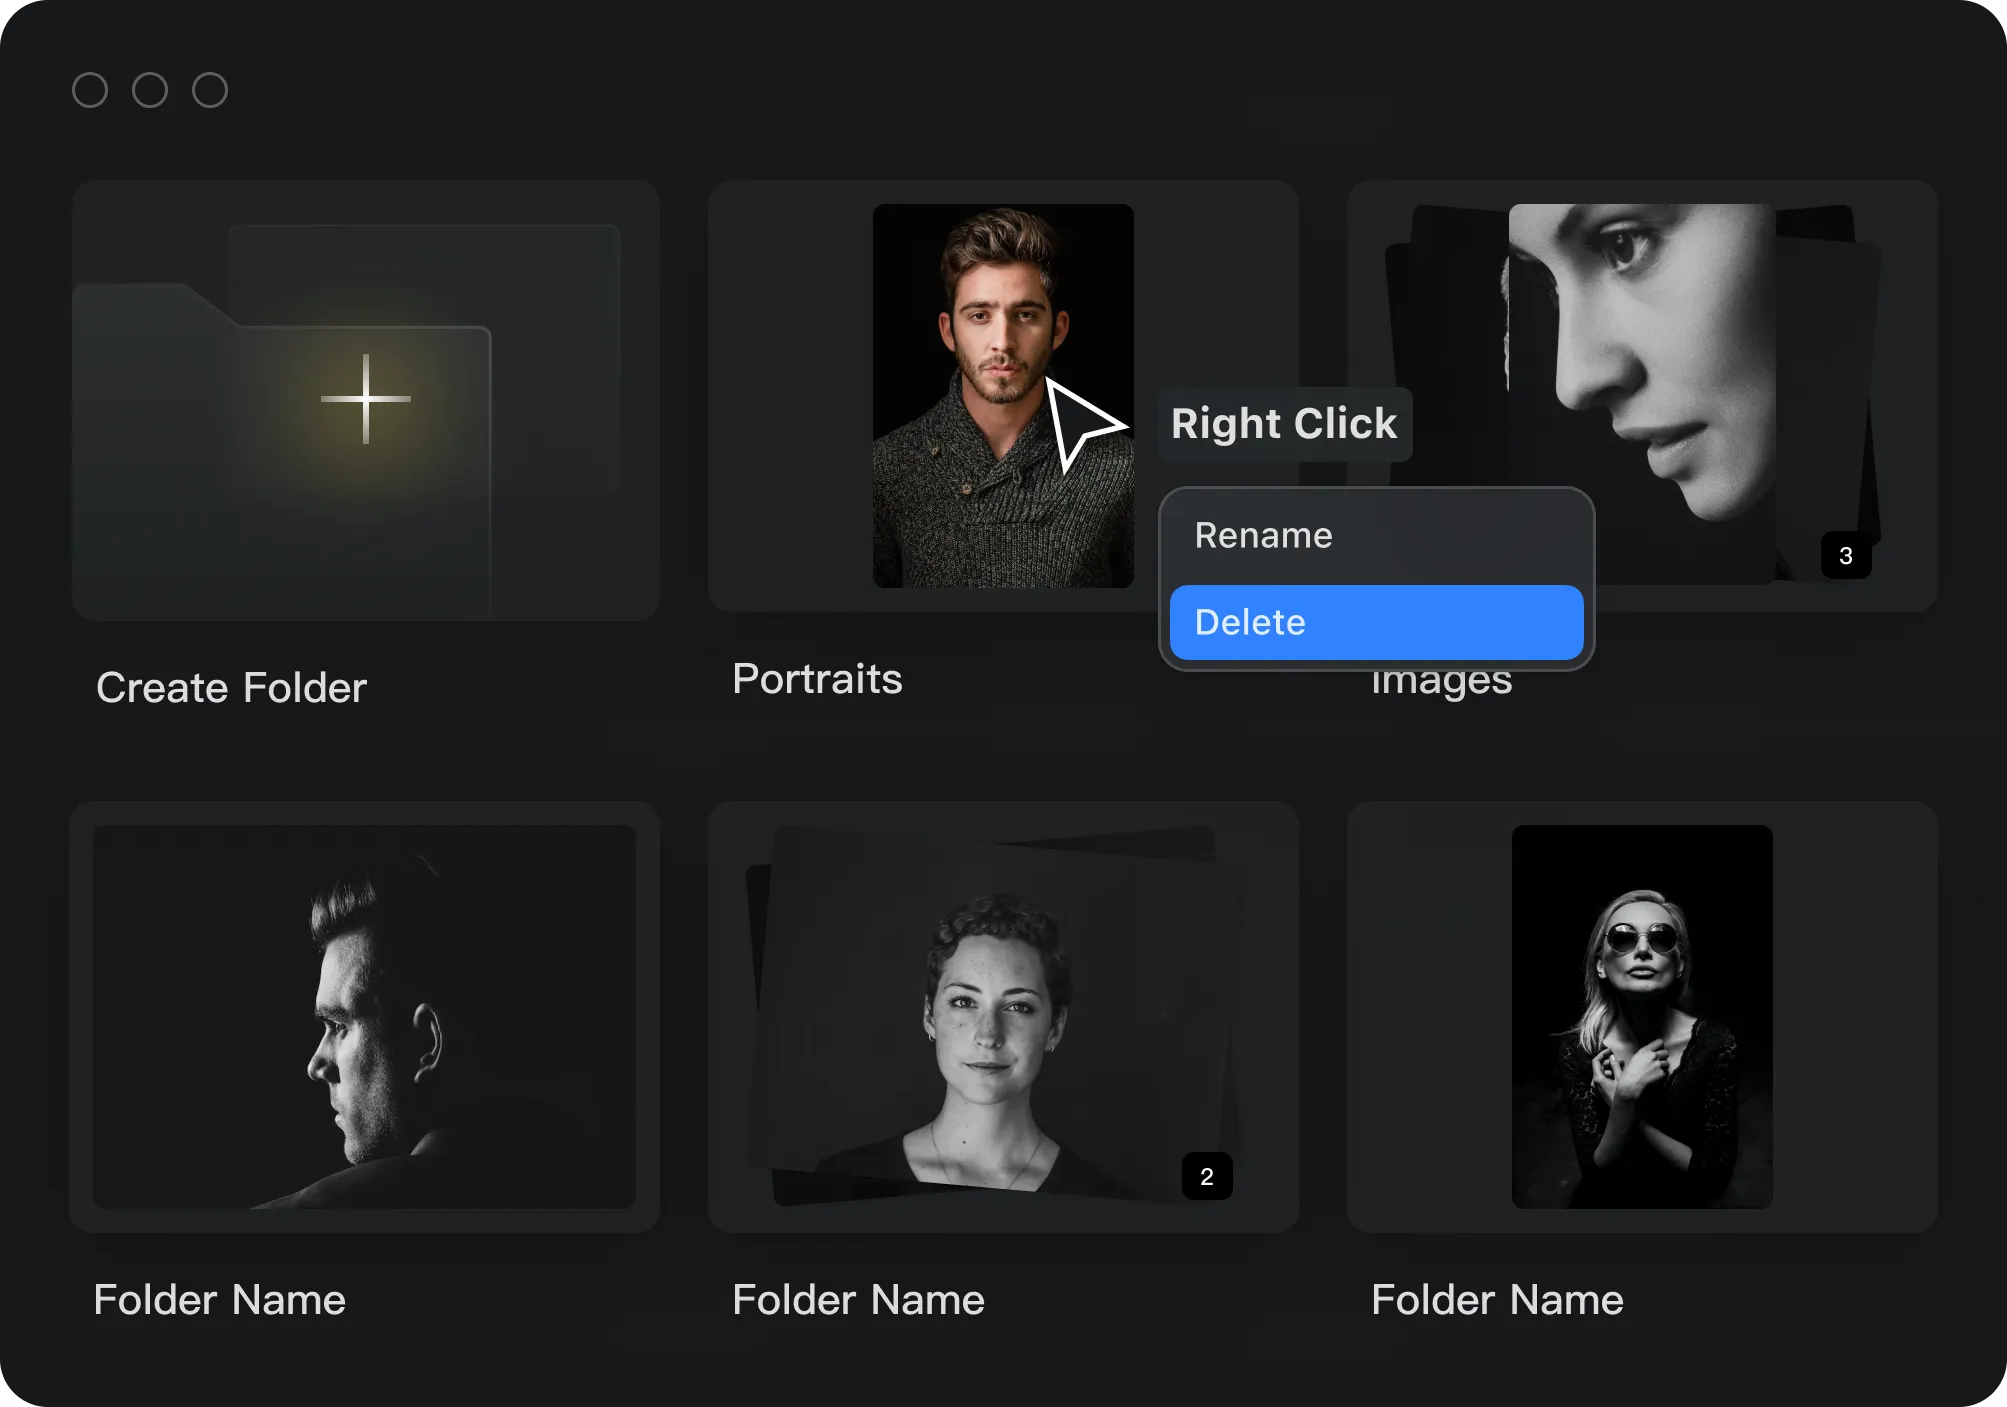
Rename Project
a. Right-click the target projectb. Select "Rename"c. Enter a new name and click "Save"
Delete Project
a. Right-click the target projectb. Select and then click "Delete"
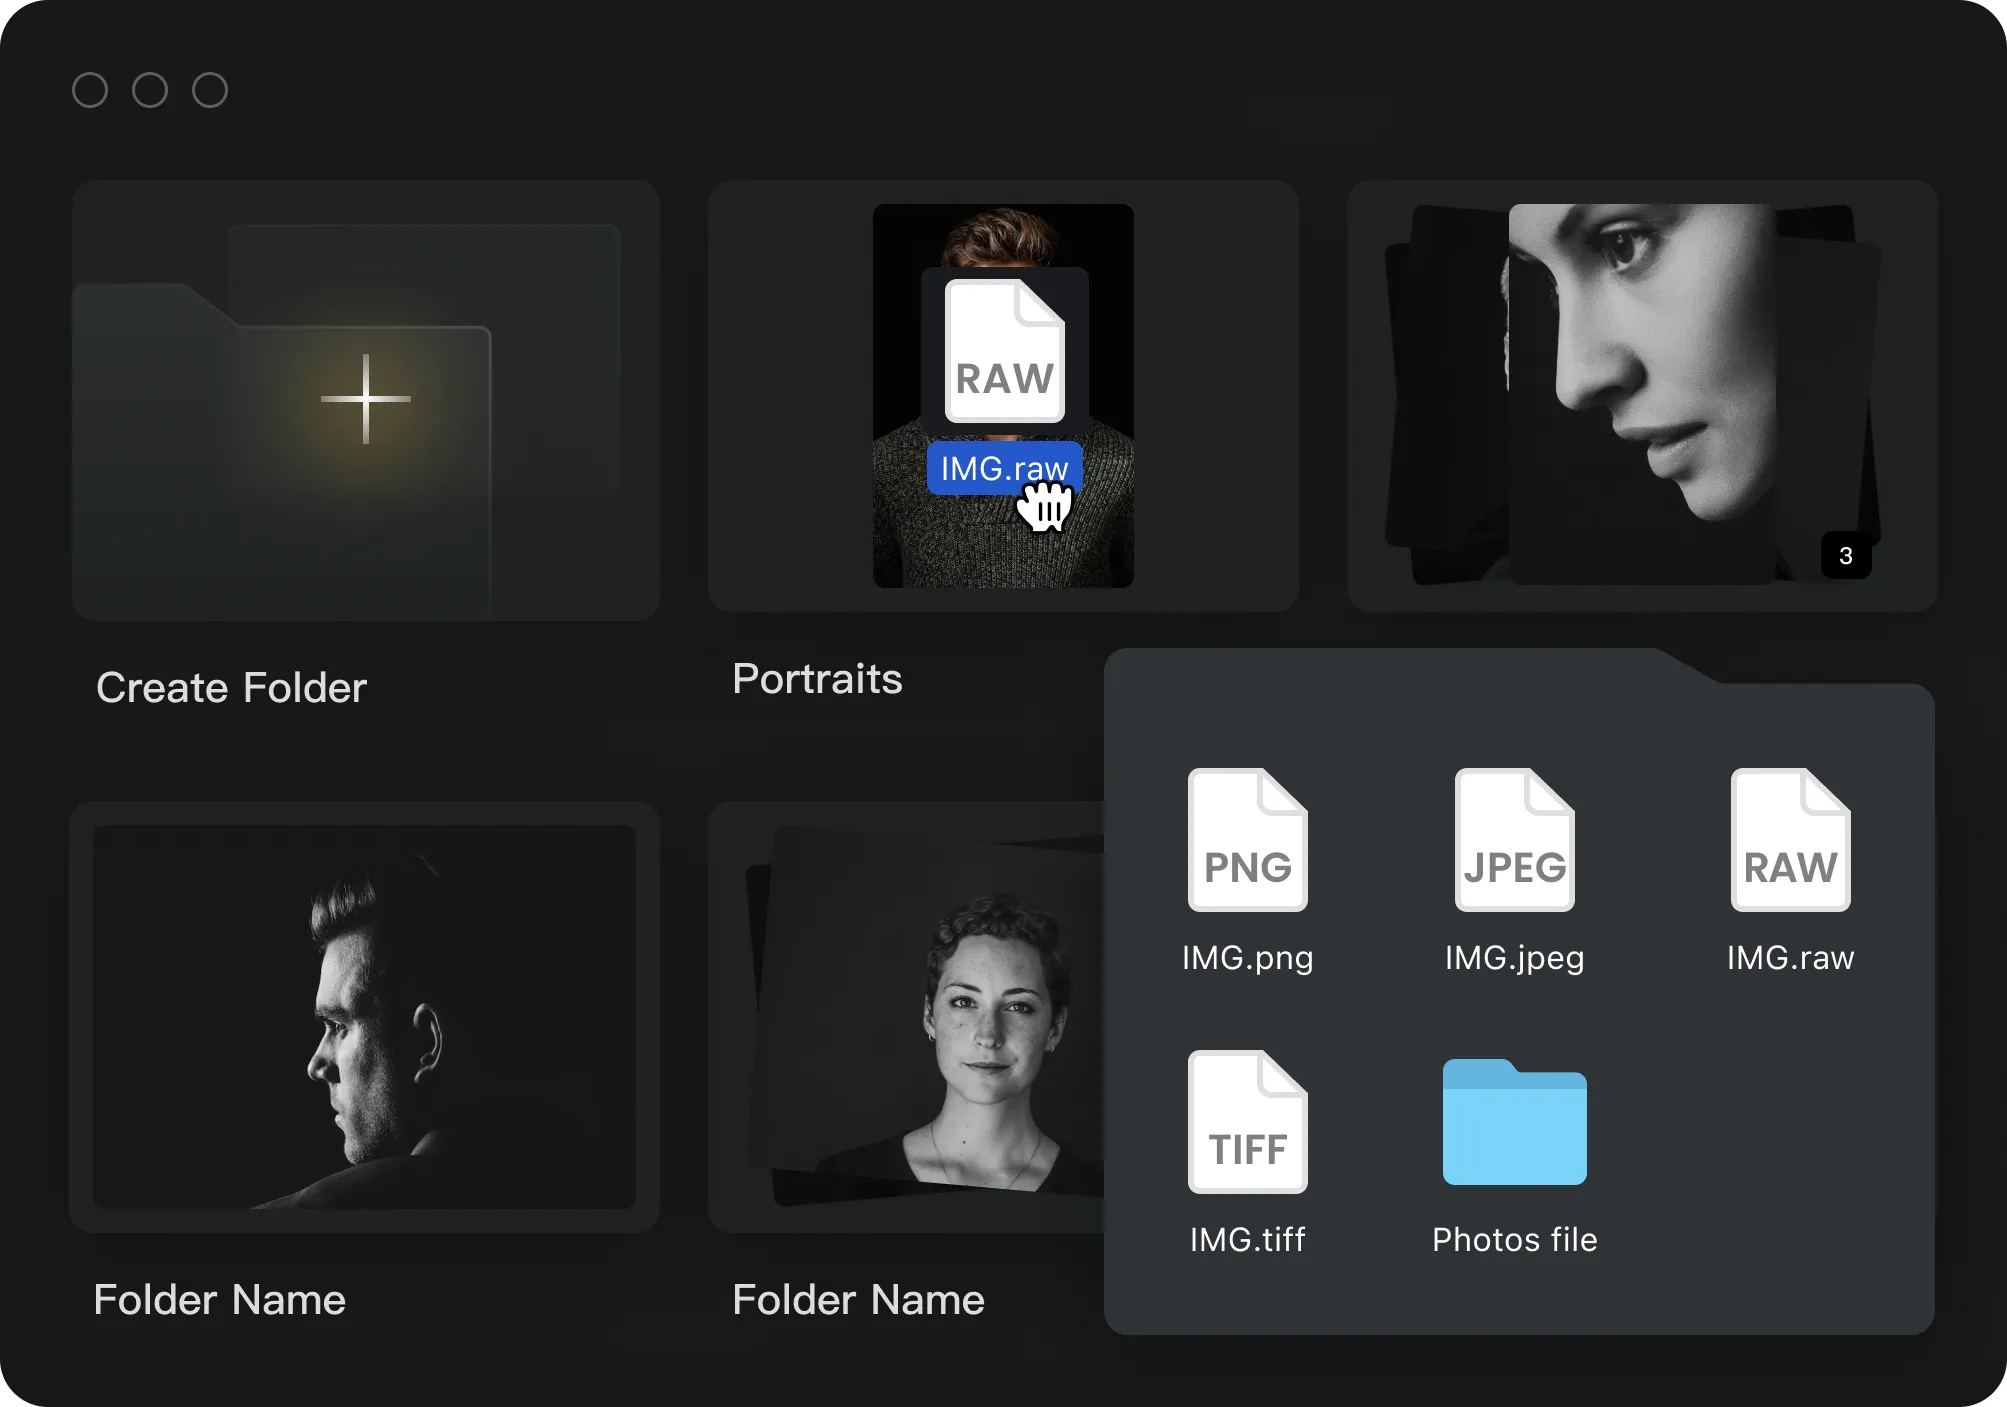
Drag and drop photos to a project
Drag and drop the selected photos into your target projects in Workspace
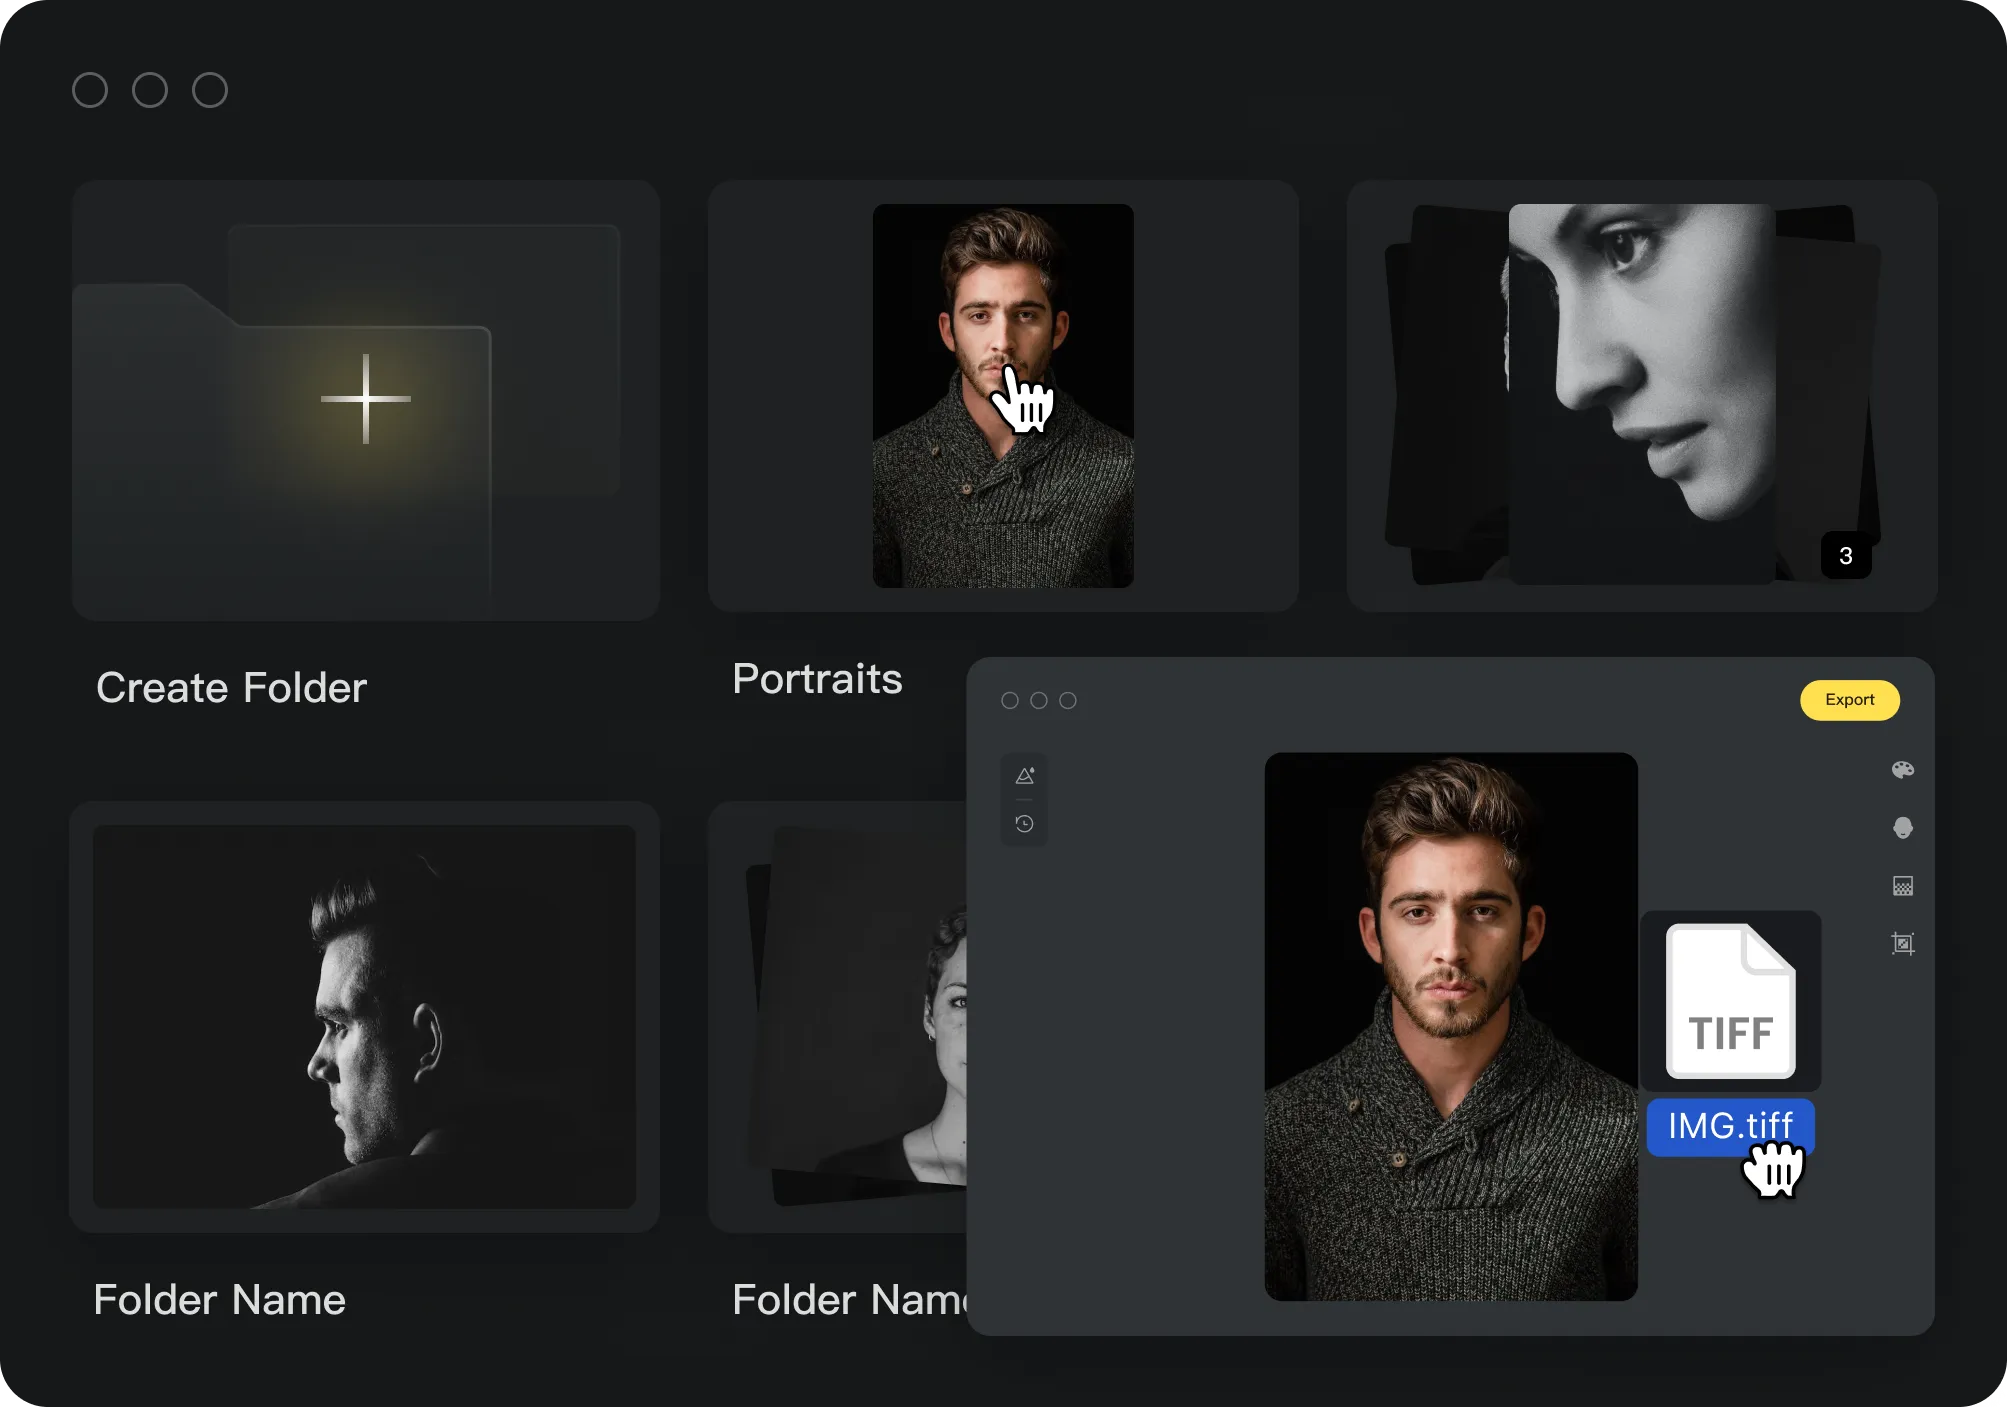
Edit project to add photos
a. Open the target projectb. Click "+"c. Select the photos or folder in your file manager and import them to the project
Portrait Presets & History
Portrait Presets and History are on the left panel of the screen. You can click the Preset icon to check the preset options, or click the History icon to check your edit history.
Edit Controls
Check the right panel for the edit options you are offered. These options are categorized as Color Adjustments, Portrait Retouching, Background Adjustments and Crop. Click on each of the menu icons to expand the detailed tools list.
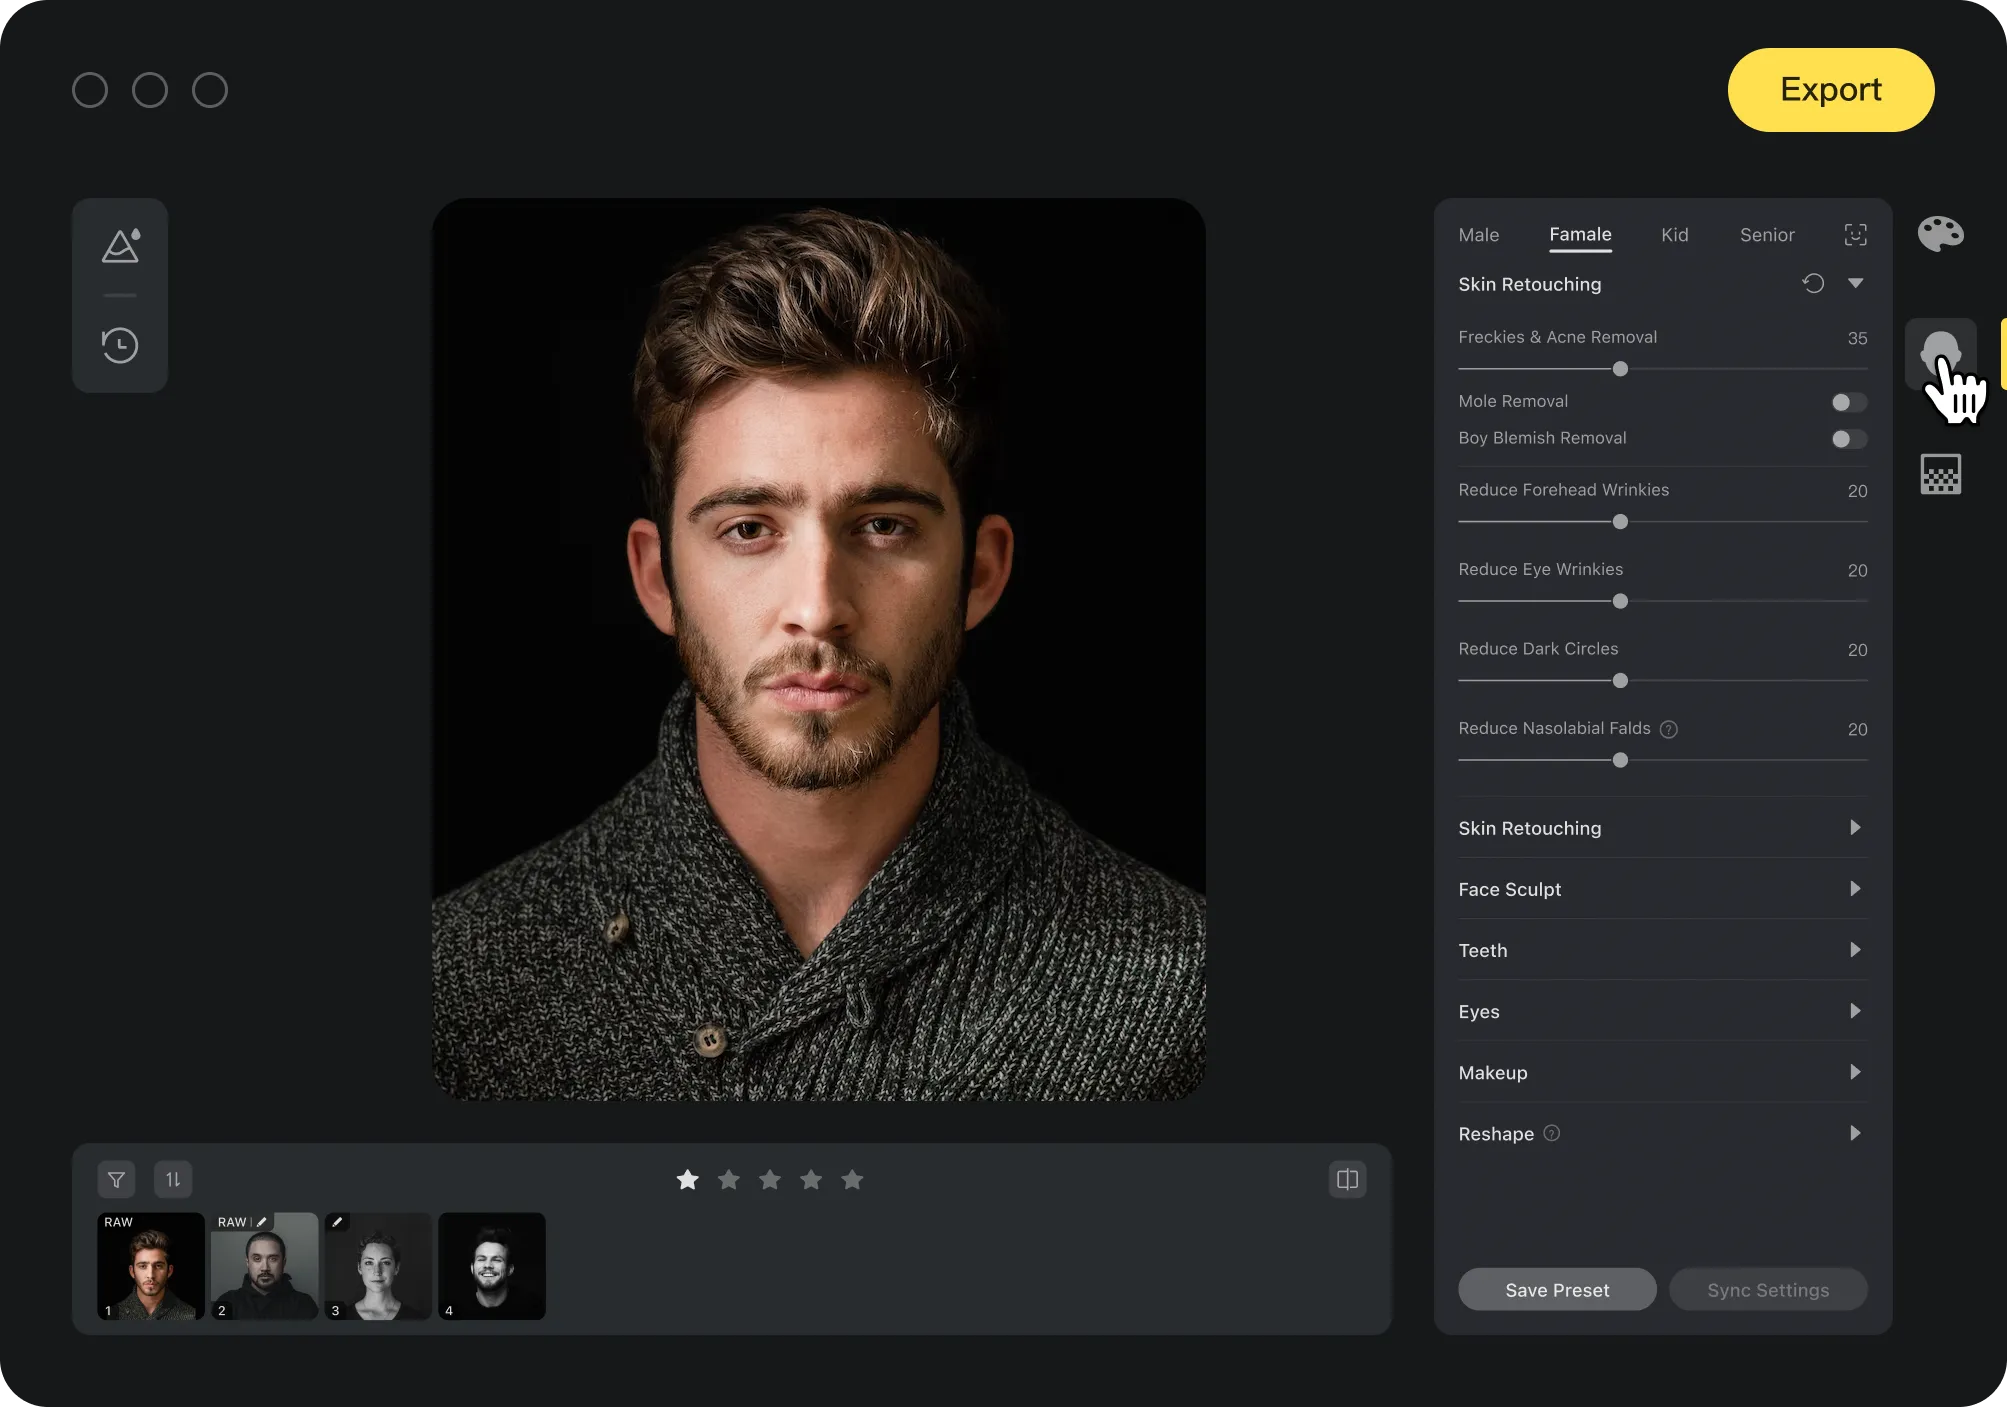
Bottom Menu
Photos in your project are displayed at the bottom of the screen. With the options displayed here you can rate photos, sort and filter them, zoom in/out to check their details, and compare the before/after effects of your edits.
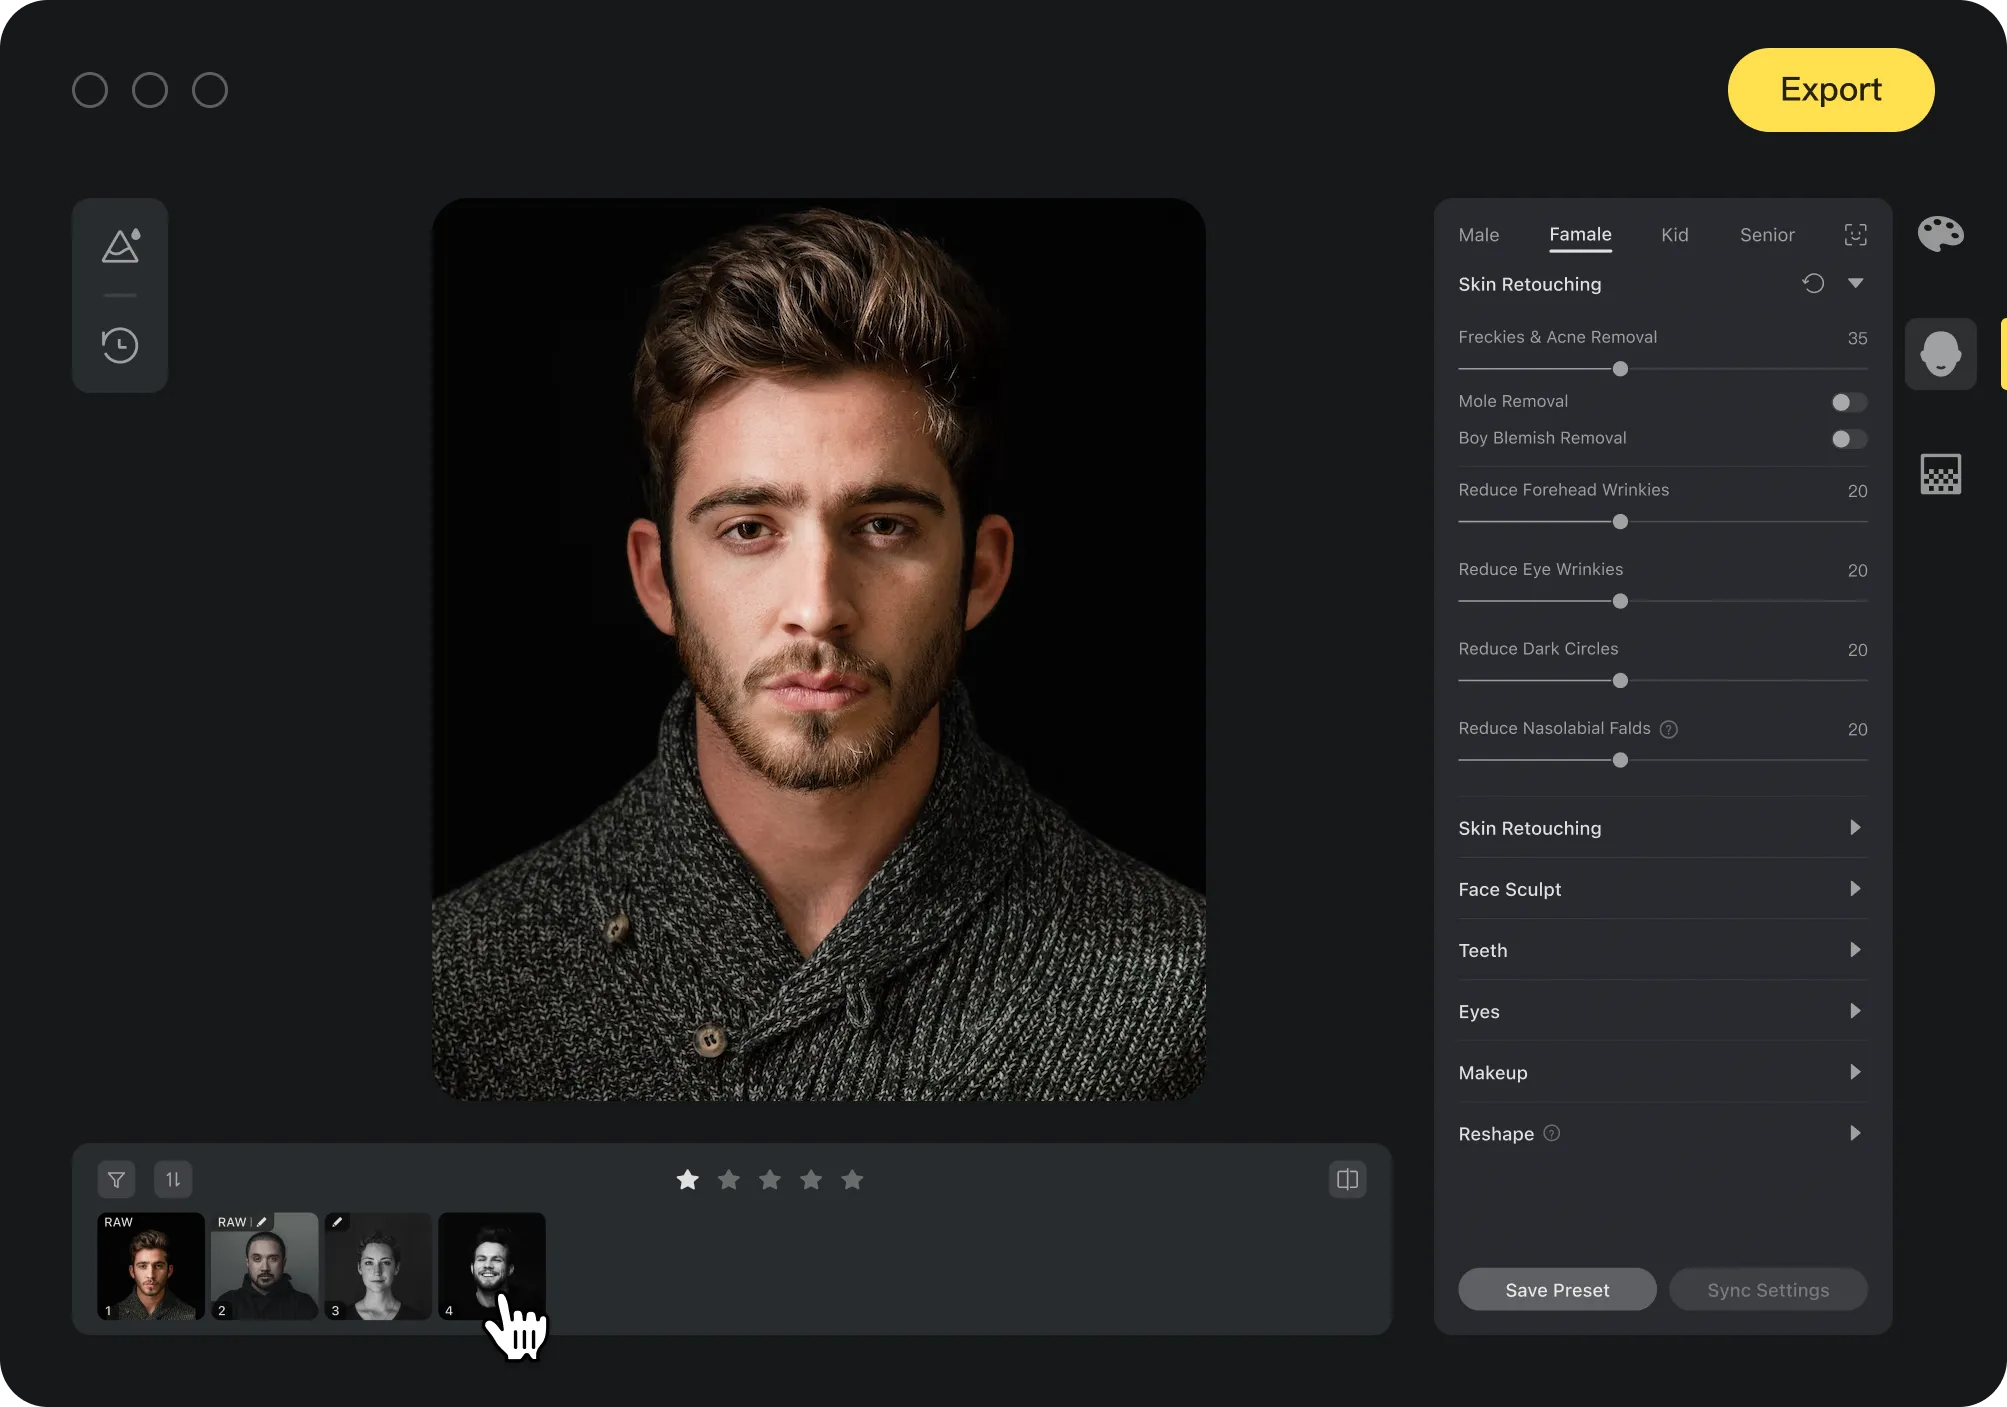
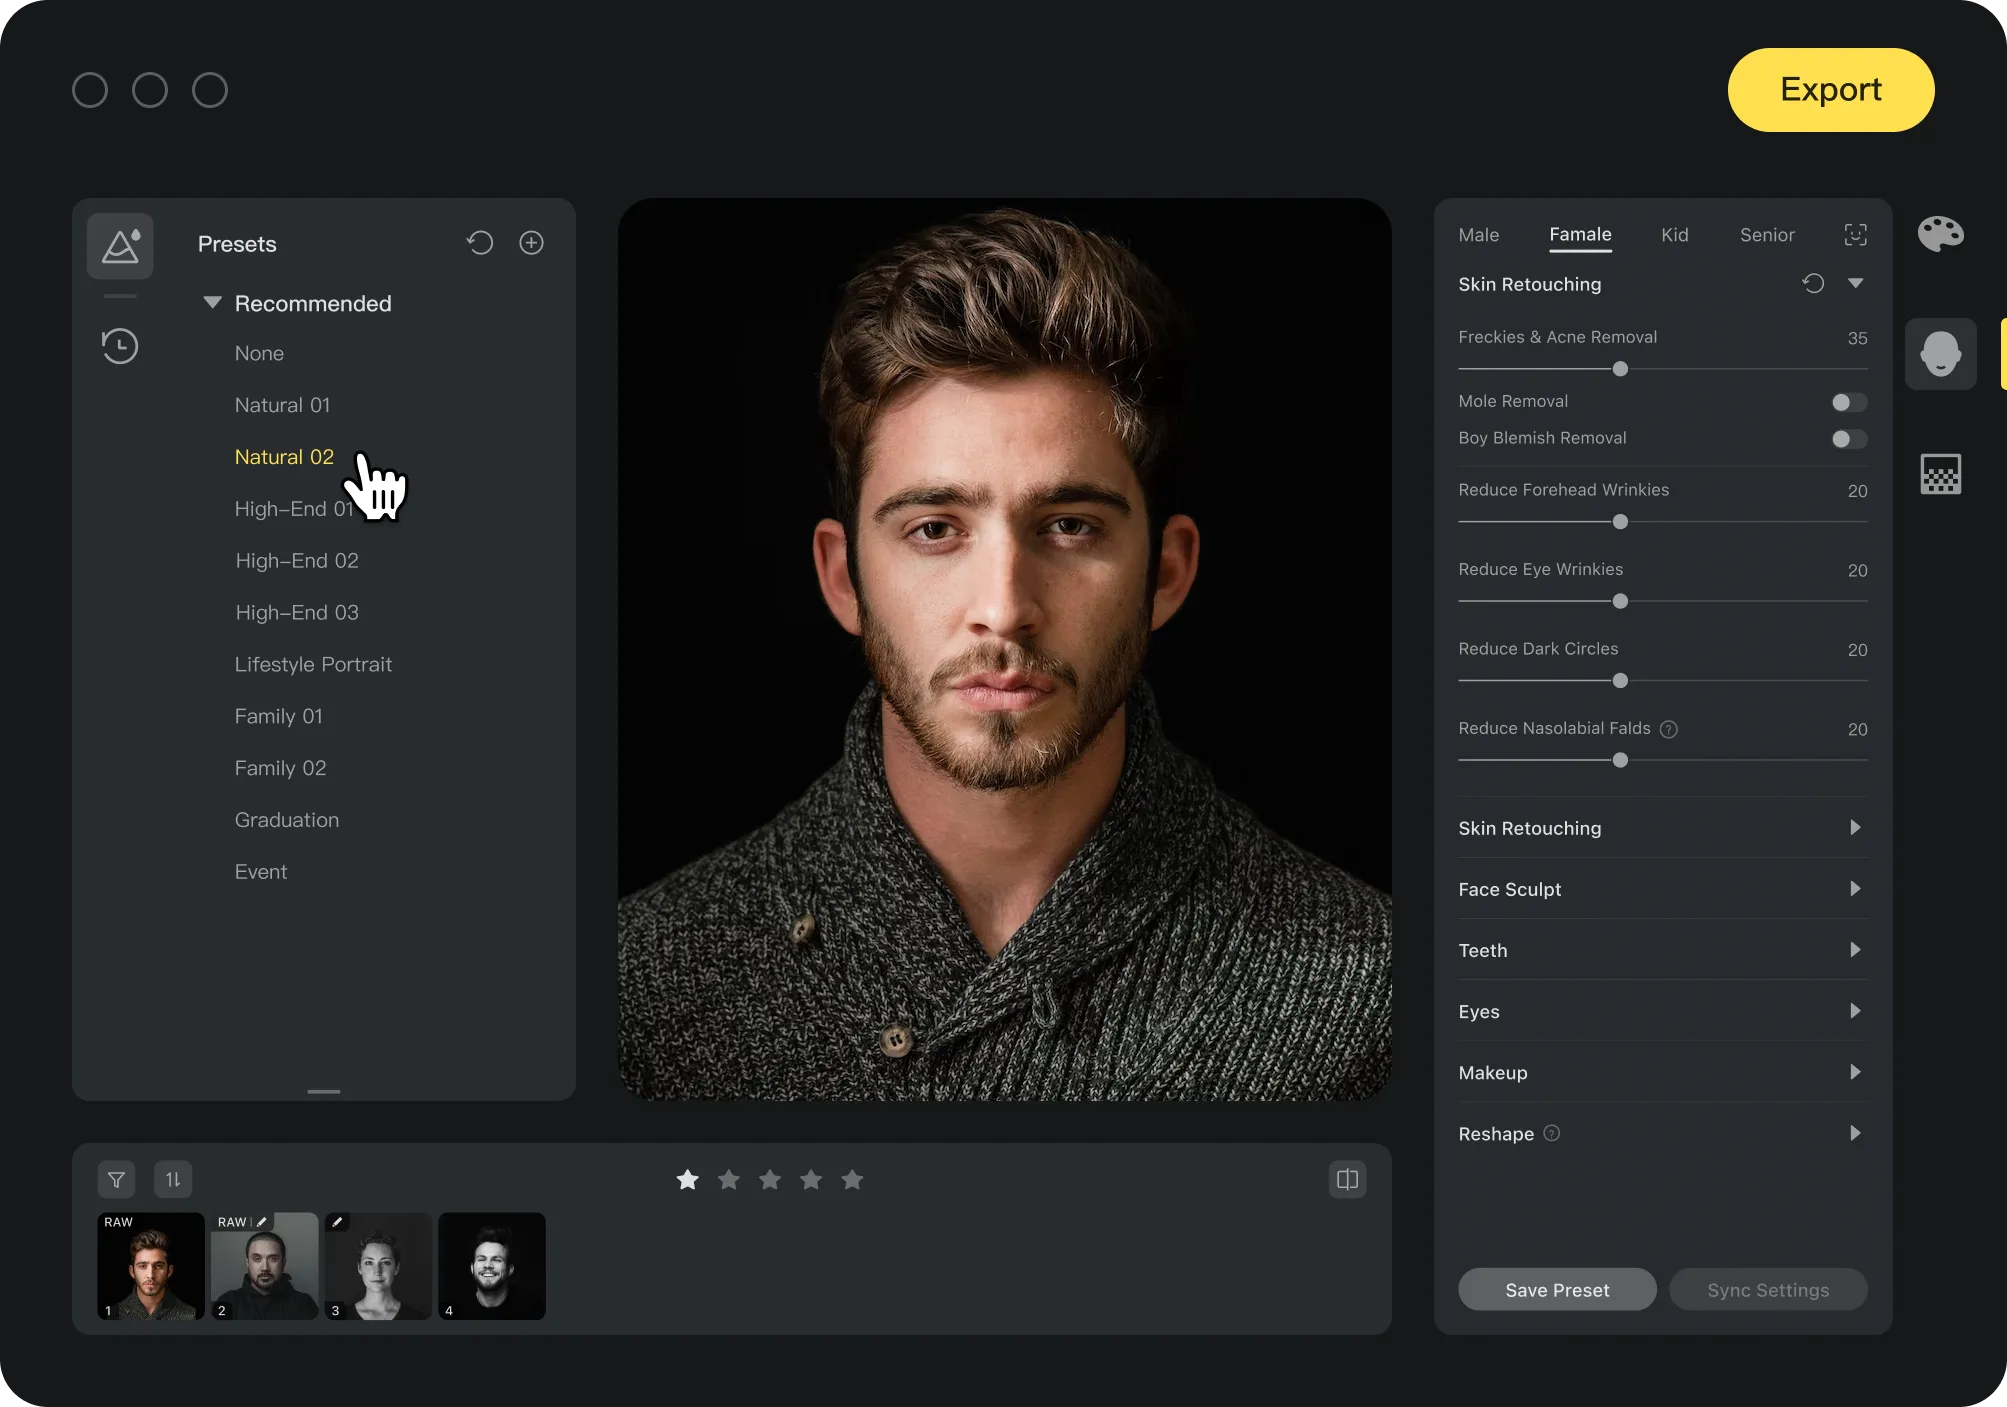
Recommended presets
Evoto provides sets of presets for photographers to edit photos. Click on a preset to preview how it works on the selected photo. The edits are reflected on the right panel for you to check.
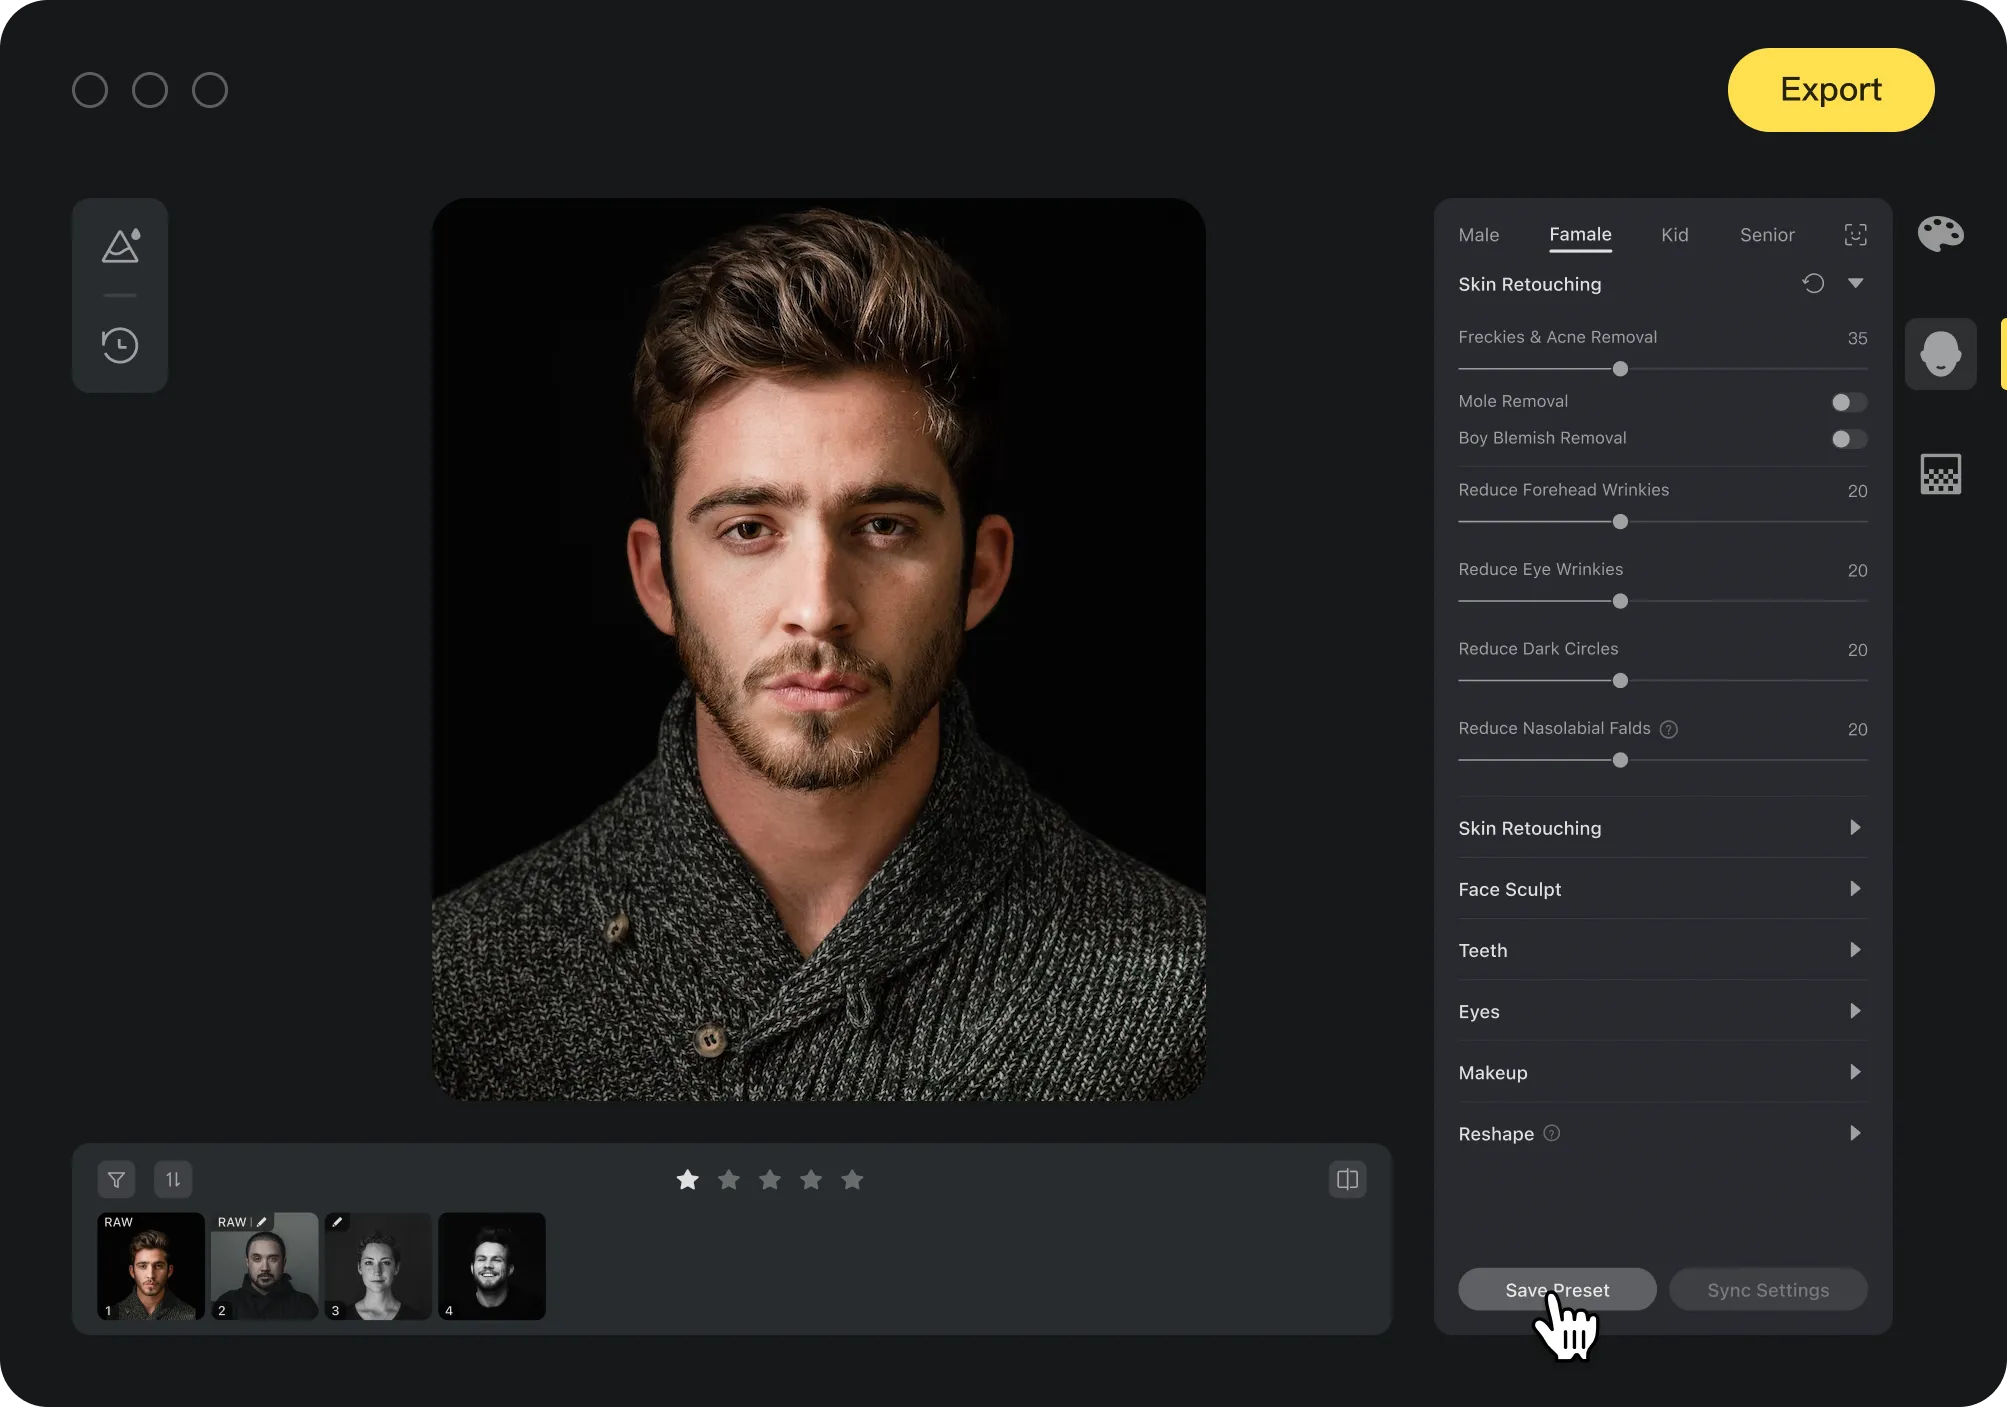
Create Preset
You can create your own presets and save them for later use.
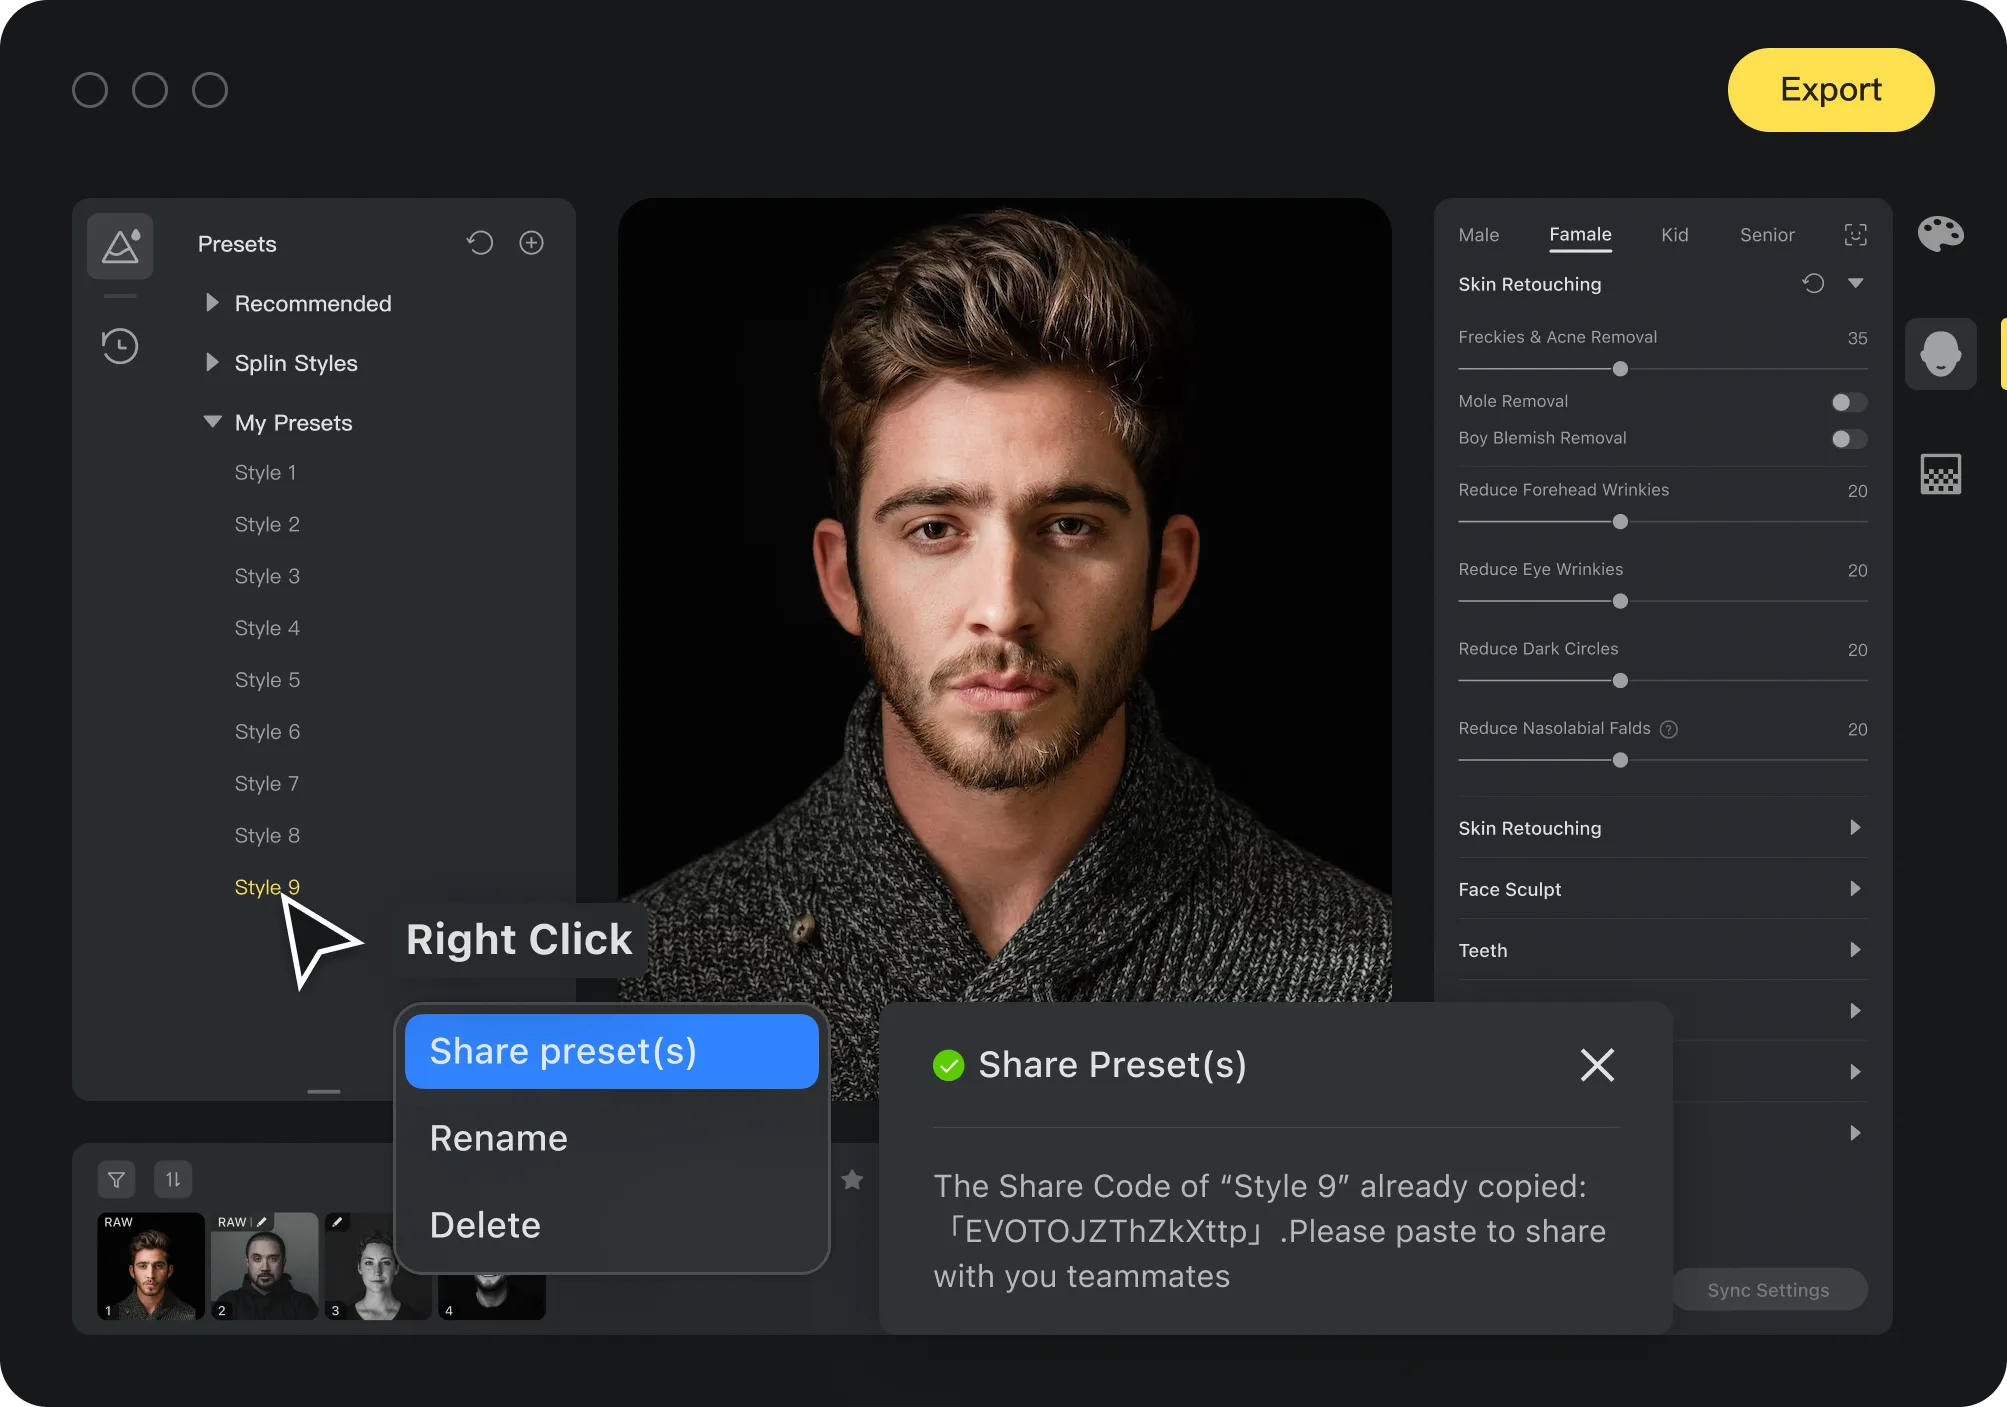
Share Preset
a. Right click on a preset to shareb. Click "Share Preset(s)". The Sharing Token is copied automaticallyc. Share the token with others to grant them access
Import presets
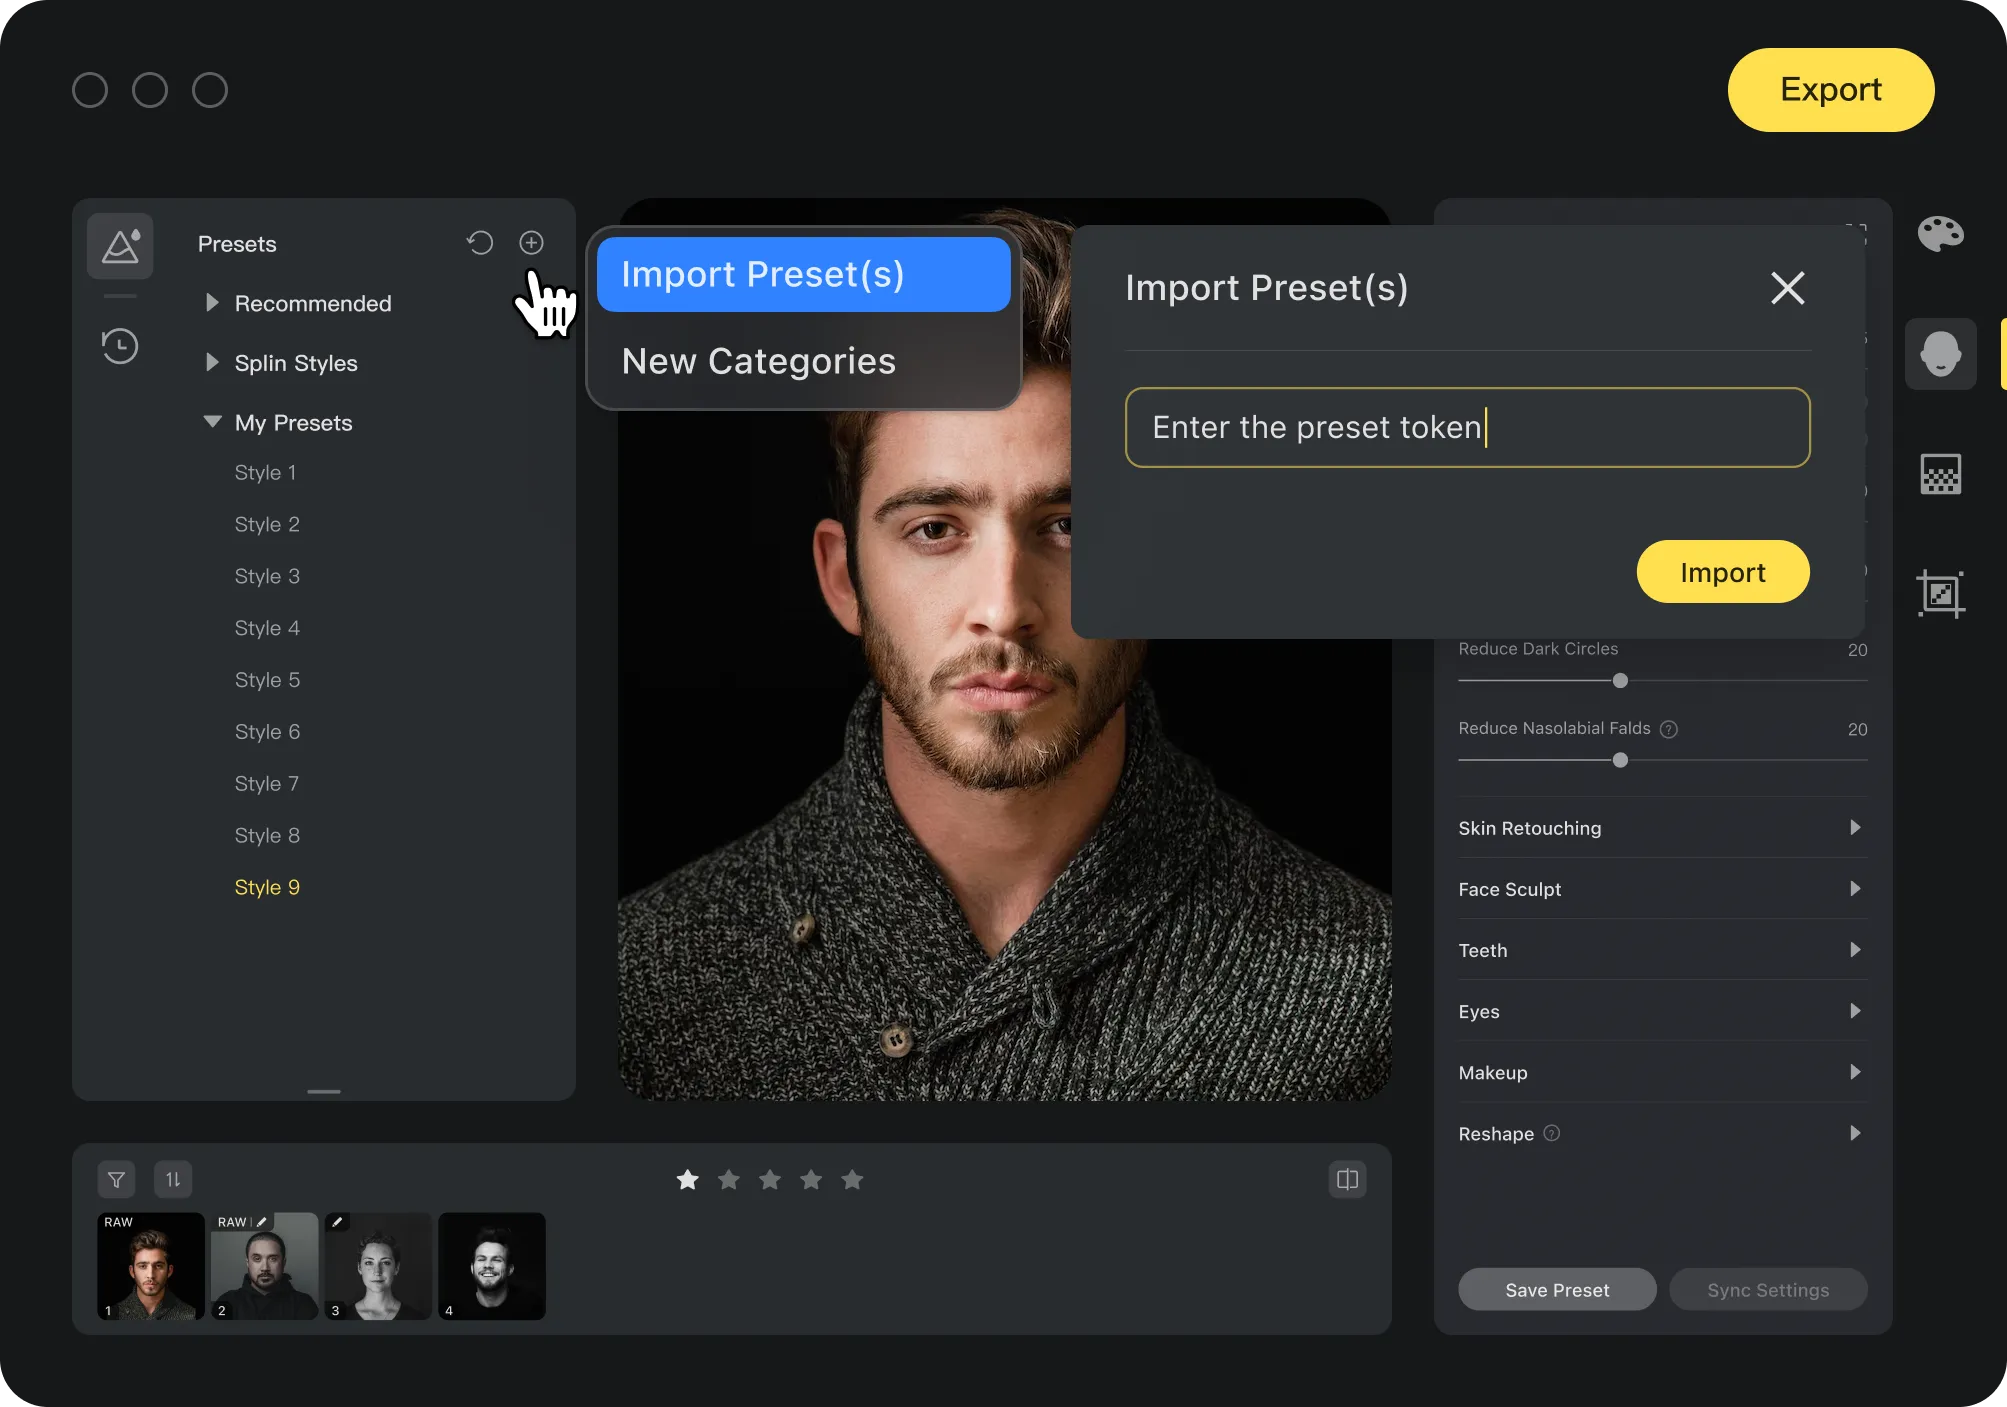
a. In Evoto, click the “+” on the upper right corner of the Presets panelb. Click “Import Preset(s)” c. Copy and paste the preset token shared with youd. Click “Import”
Sync edits
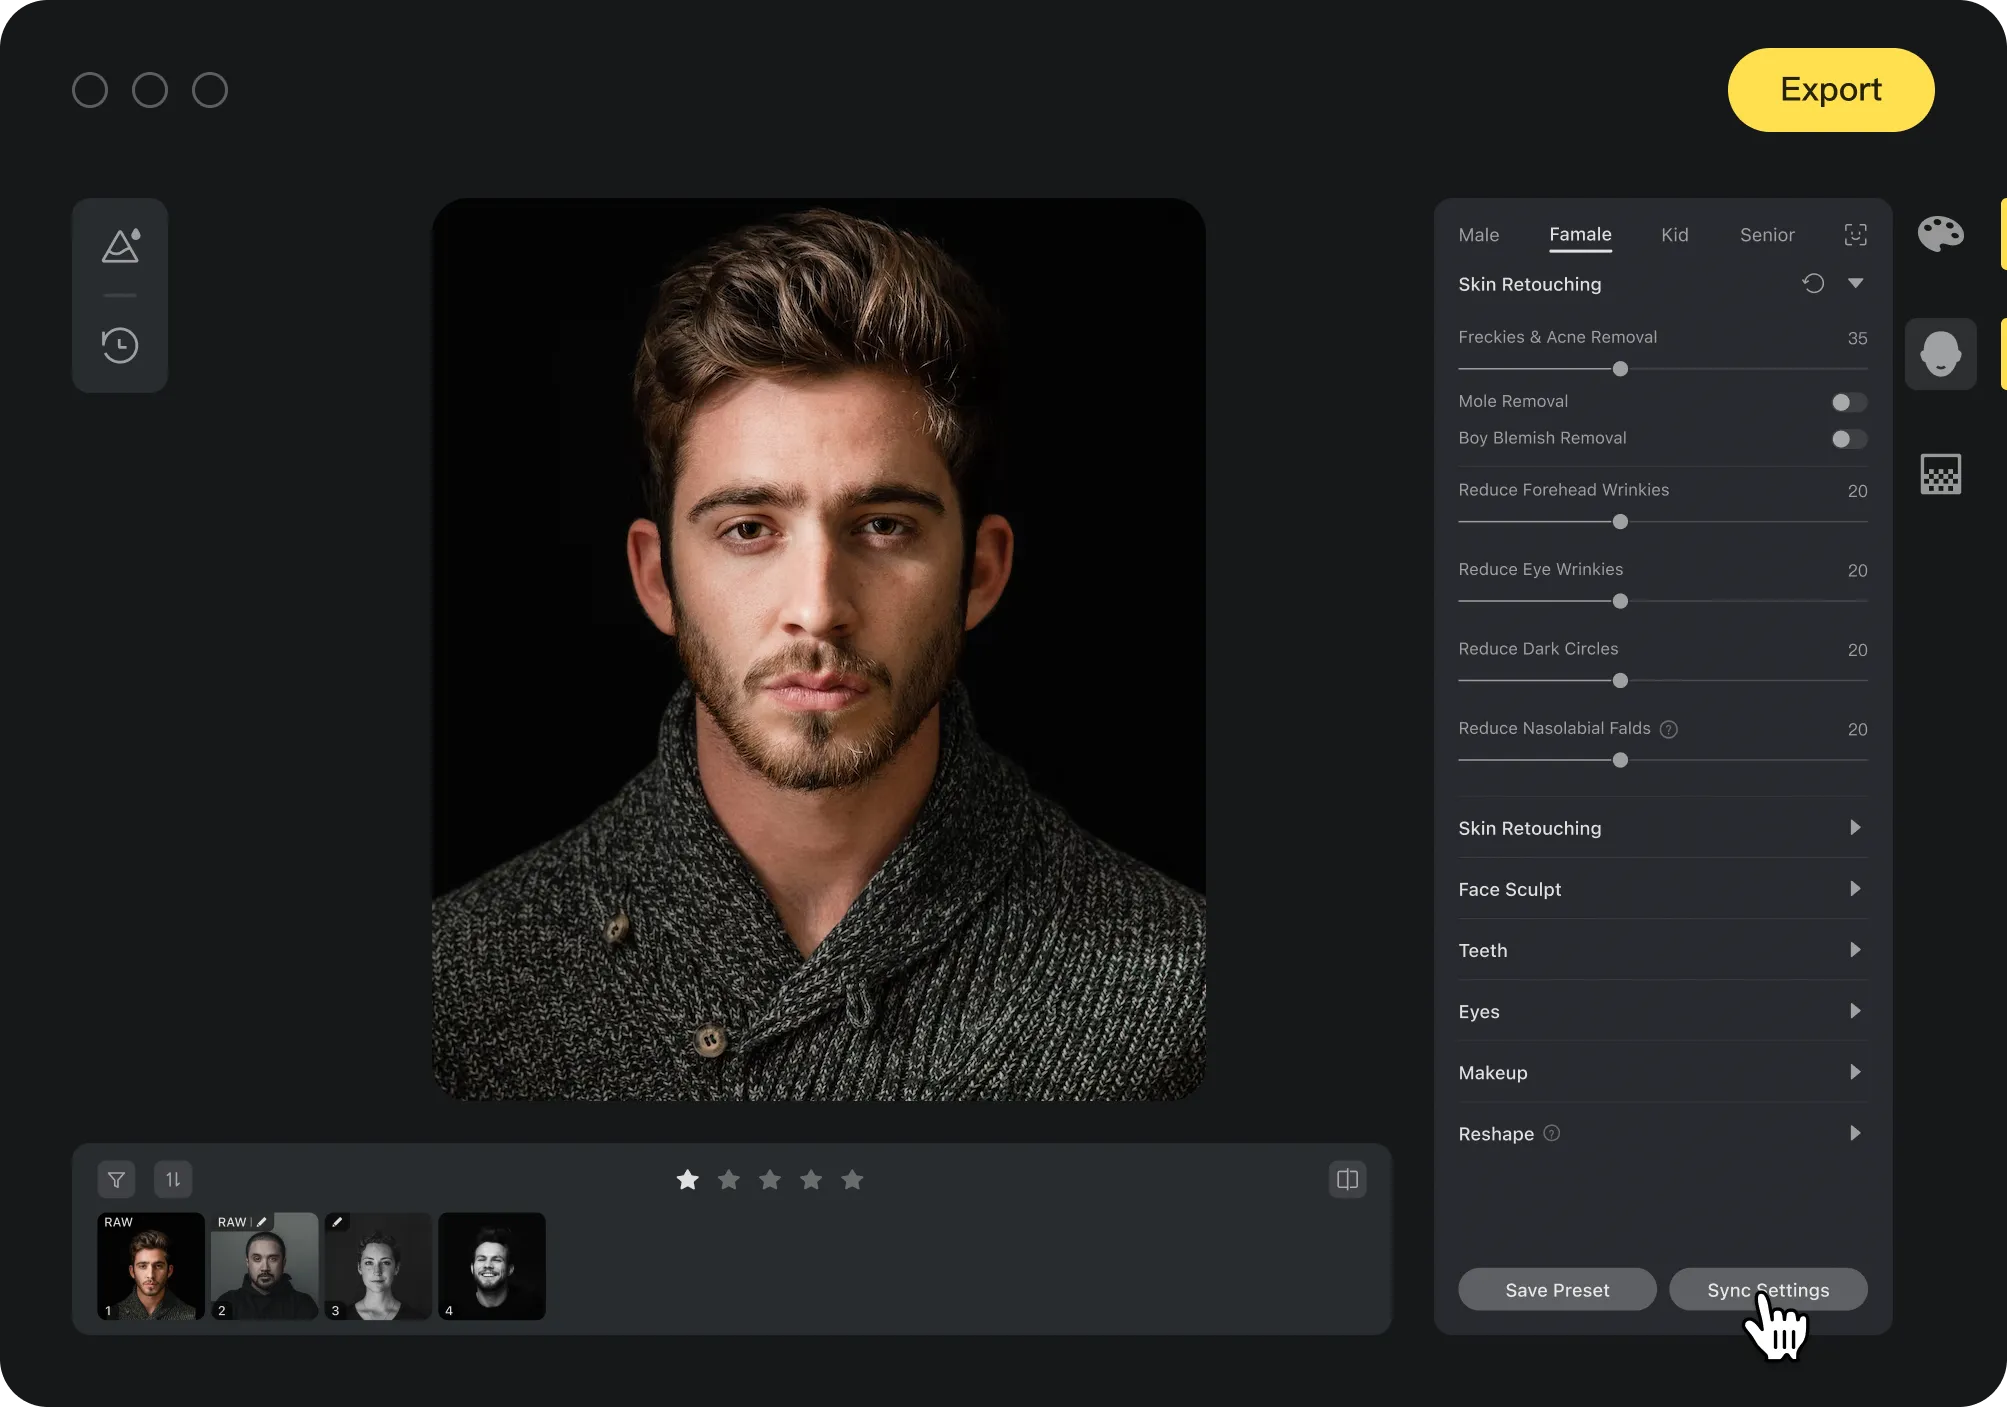
To edit a series of photos:a. Edit one of themb. Select the restc. Click "Sync" button to apply your edits to them allYou can also "copy" your edits on one photo and "paste" them to the other photo(s).
Apply Presets
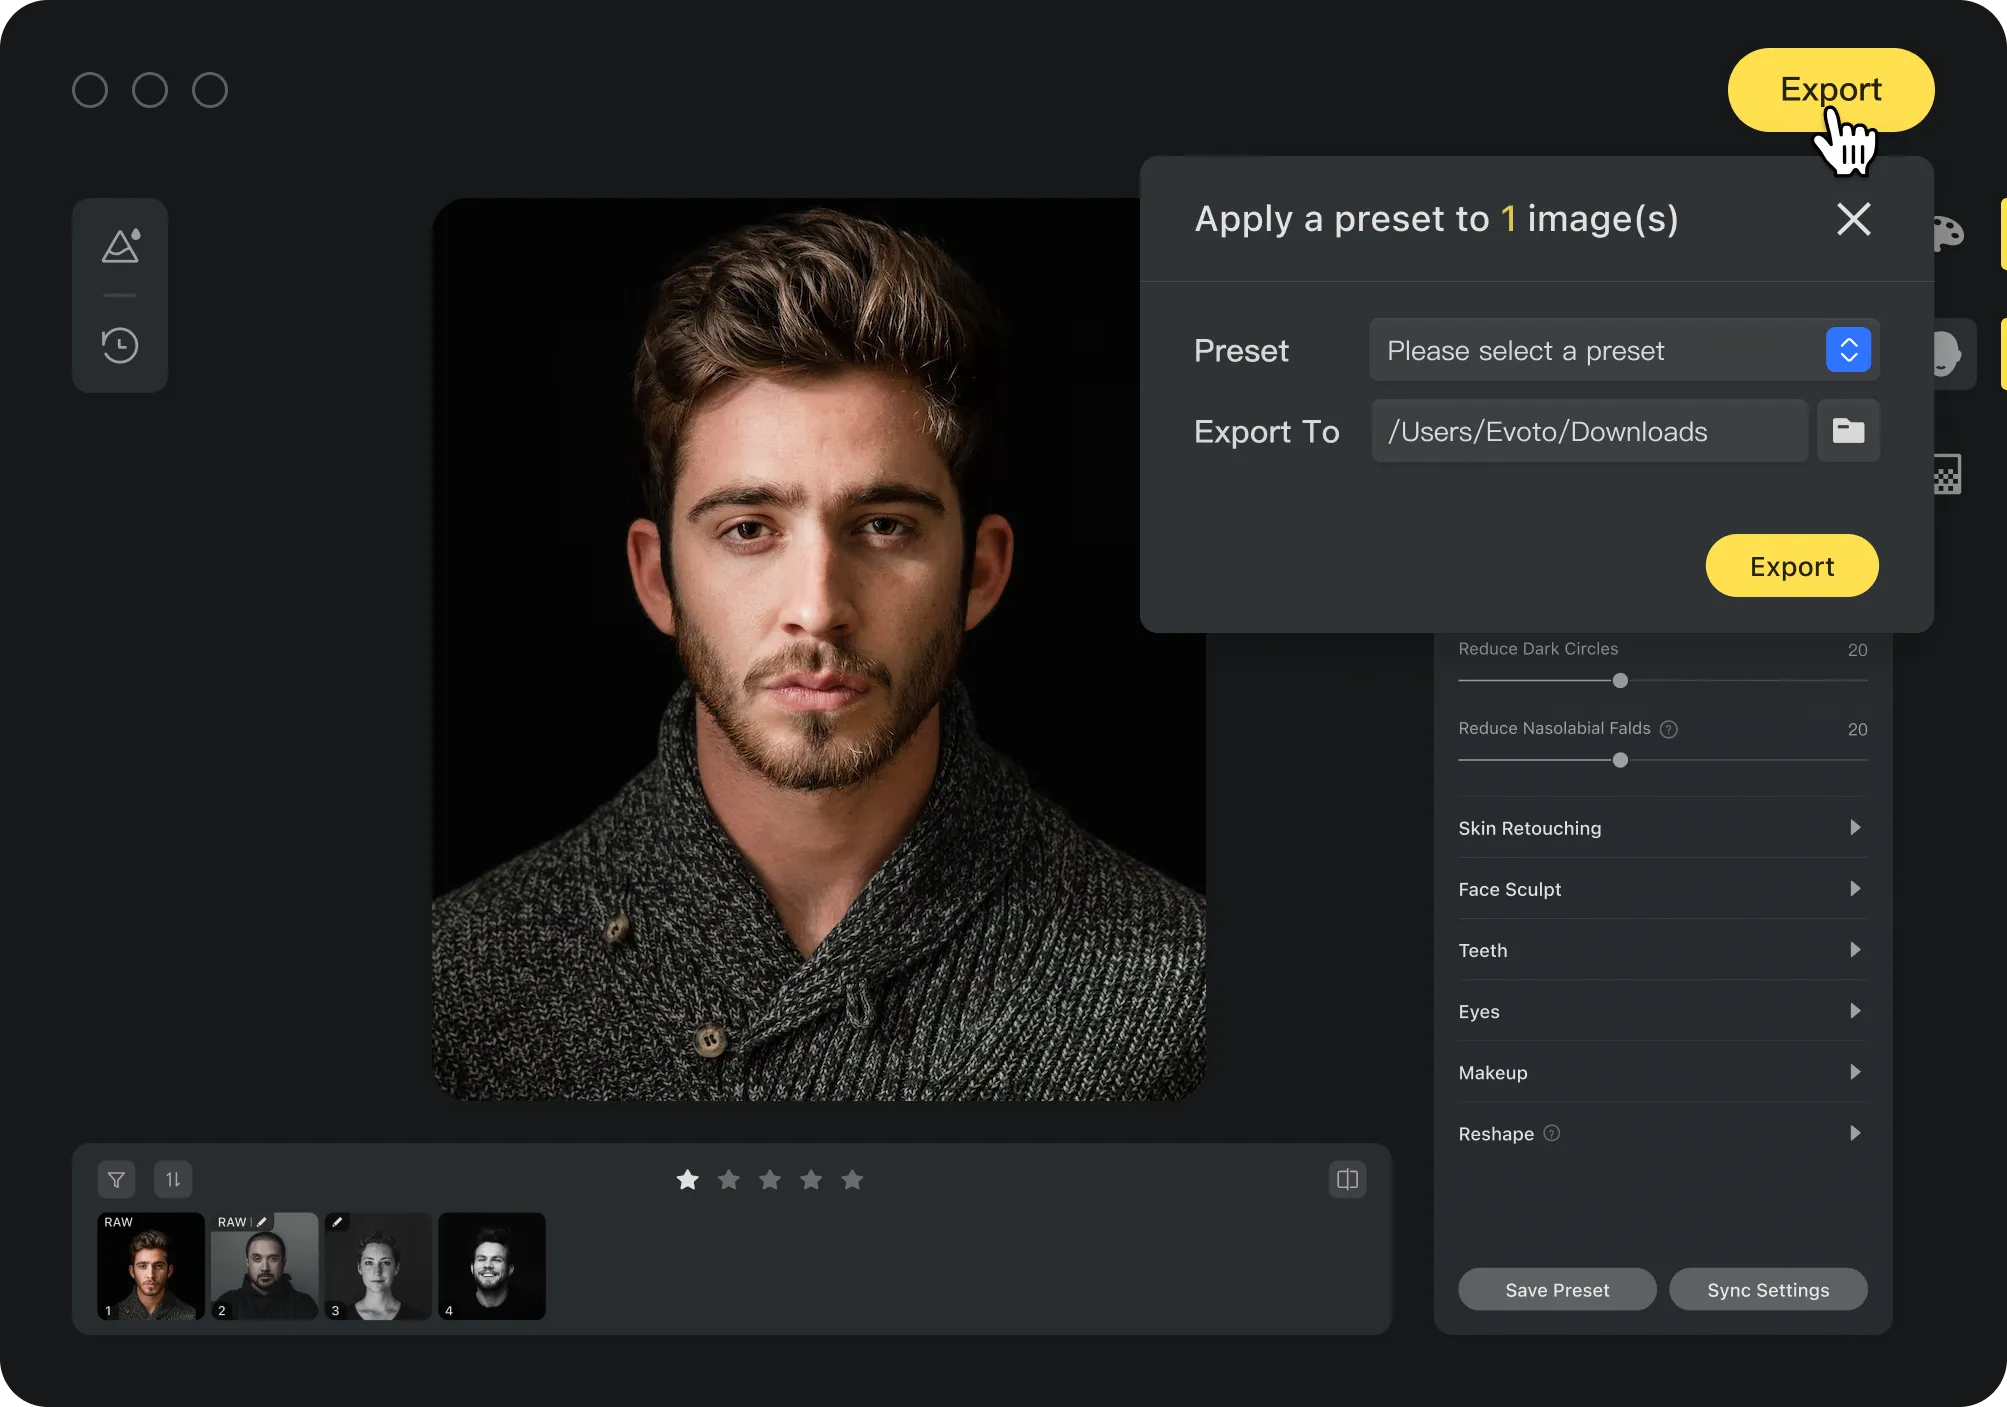
Applying a preset to your photos is a good way to improve efficiency.Tip: After importing your photos, click the "Export" button in the upper right corner, then select a preset in the export settings dialog and click "Export".
Export Photos
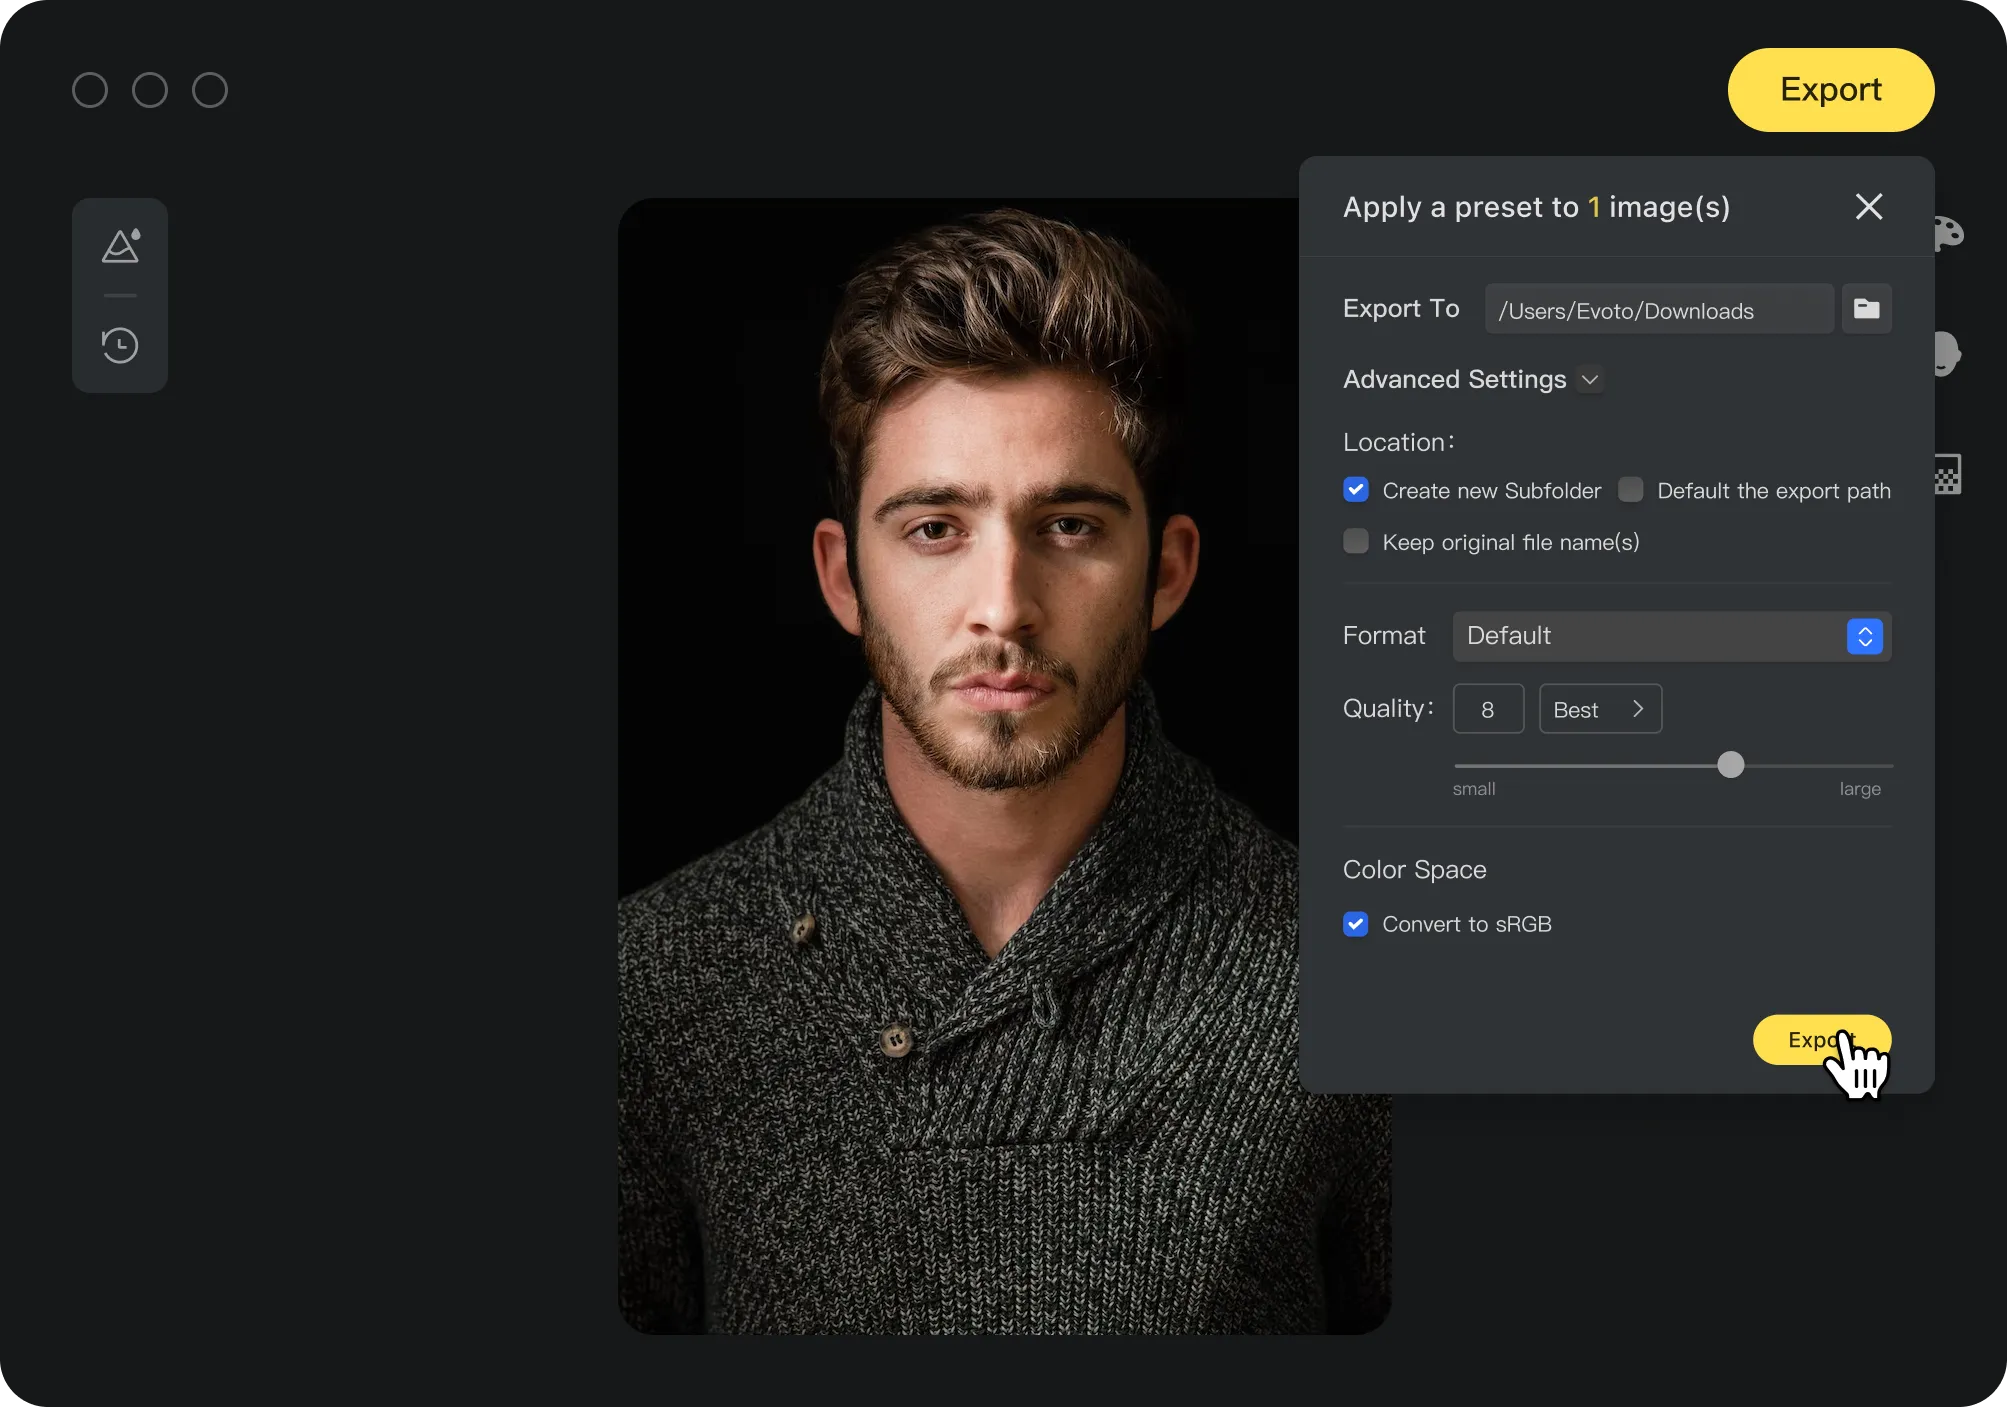
Export photos with the edits you've applied to them. Simply select photos to export and click the "Export" button in the upper right corner. Customize your export settings and click "Export".
Check progress
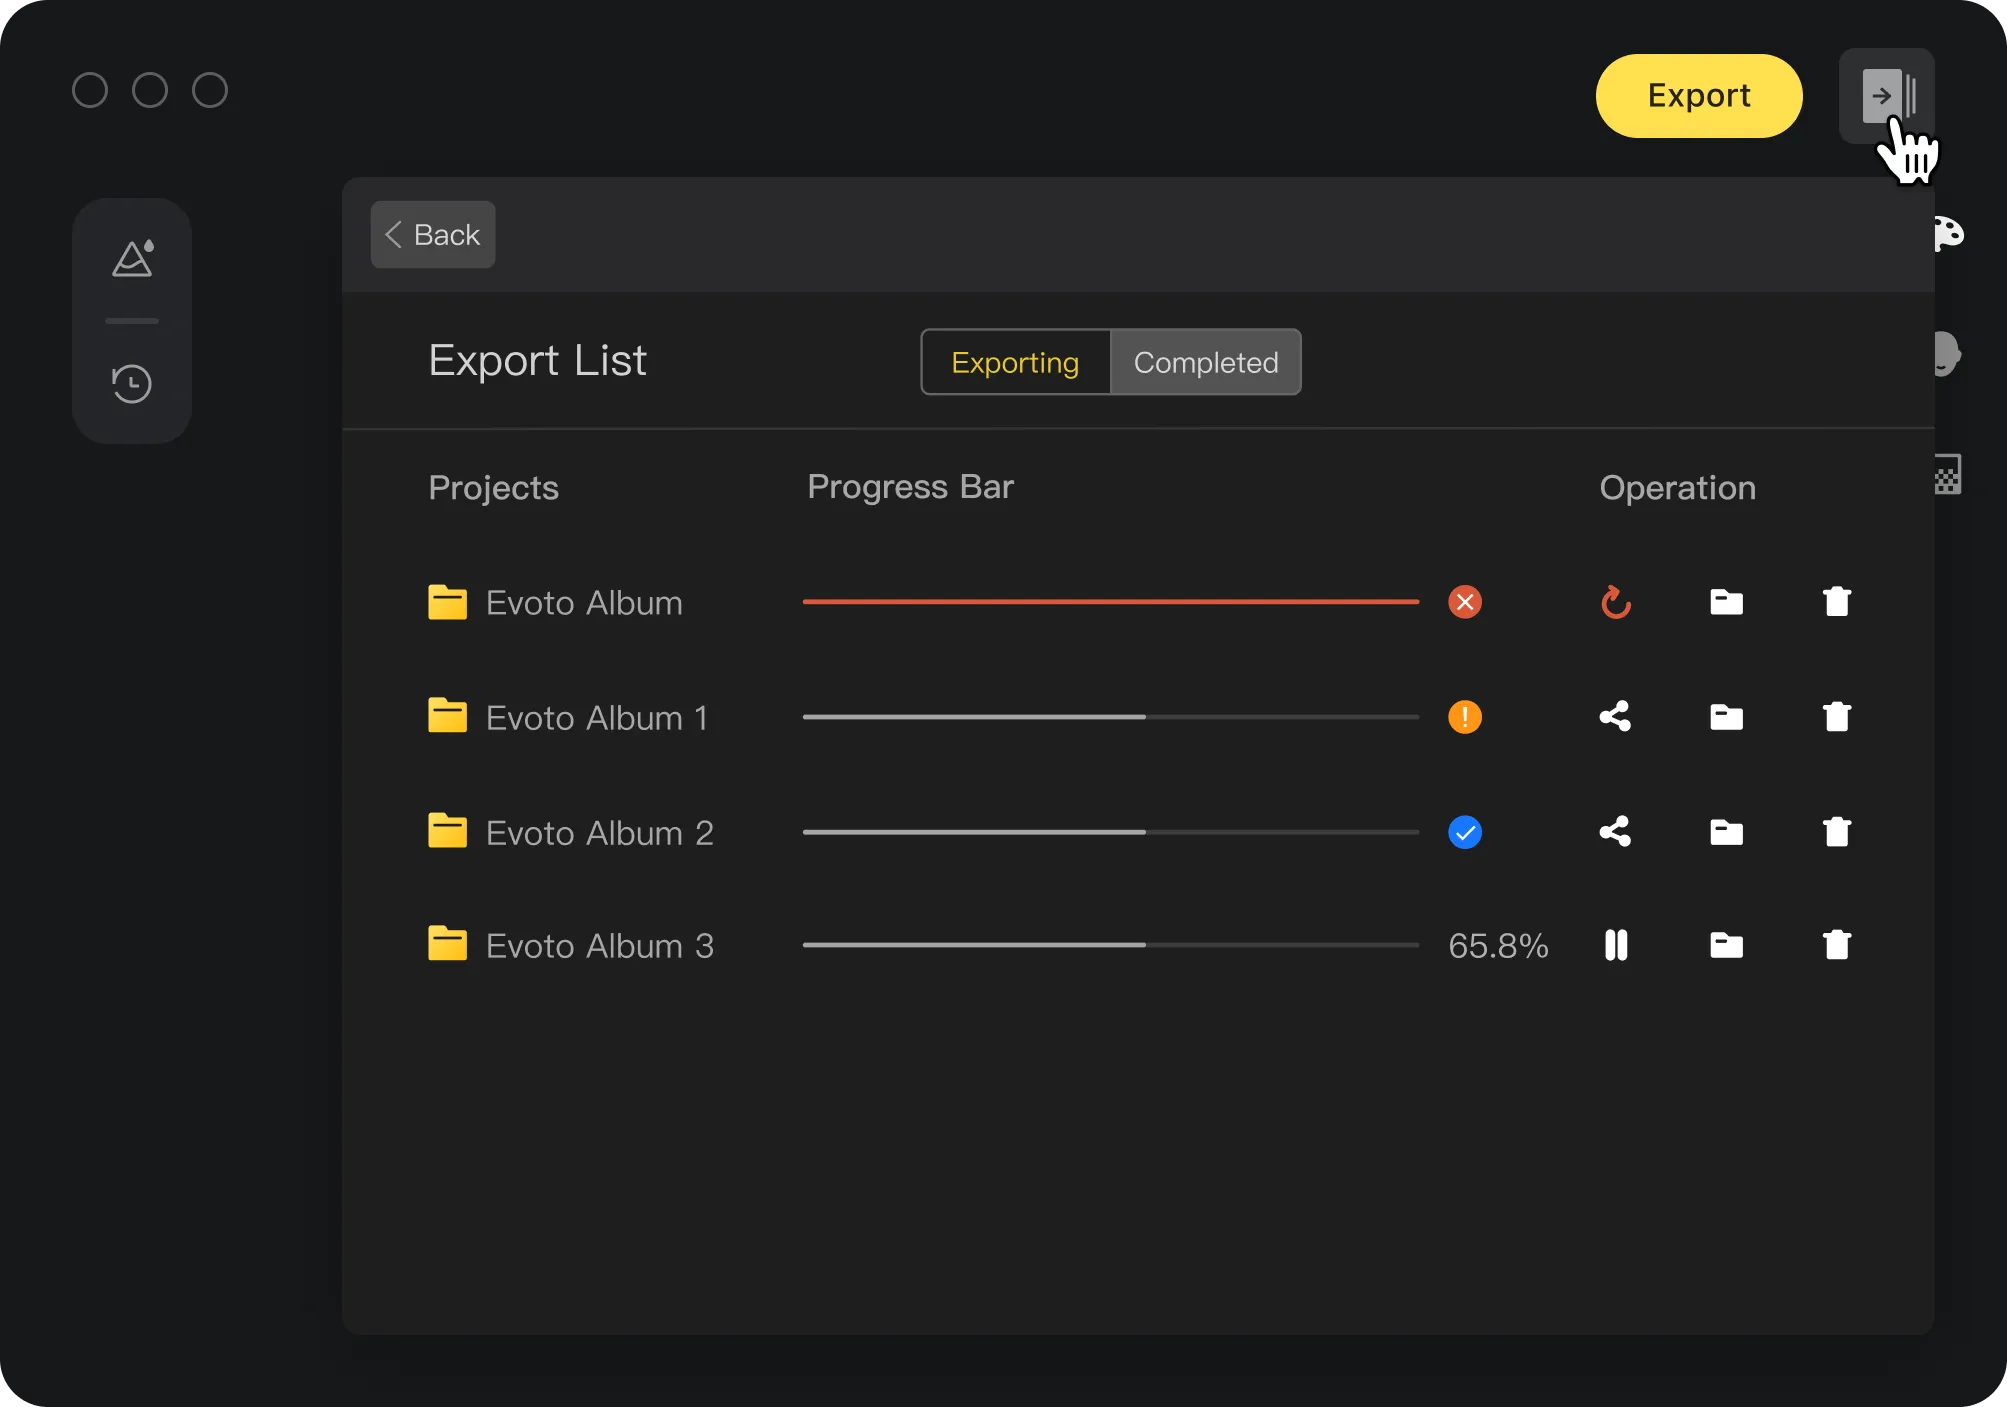
Beside the "Export" button is the option to click and open up your list of export jobs and check their progress.
Understand Your Workspace
Your photos and albums live in the workspace. By creating projects here, you can organize your work easily and make edits quickly.
1
Create Projects & Import Photos
Create new project in your Evoto workspace
a. Enter Workspace > Click "Create Project"b. Input a project namec. Click "+" to import photos or folders
Drag and drop your photos/folder to create a project
a. Select the photos or folders you want to importb. Open your Evoto Workspacec. Drag and drop your photos or folders into your Workspace to create a new project
2
Manage Projects
Rename Project
a. Right-click the target projectb. Select "Rename"c. Enter a new name and click "Save"
Delete Project
a. Right-click the target projectb. Select and then click "Delete"
Add photos to existing projectsDrag and drop photos to a project
Drag and drop the selected photos into your target projects in Workspace
Add photos to existing projectsEdit project to add photos
a. Open the target projectb. Click "+"c. Select the photos or folder in your file manager and import them to the project
3
Explore Editing Options
Portrait Presets & History
Portrait Presets and History are on the left panel of the screen. You can click the Preset icon to check the preset options, or click the History icon to check your edit history.
Edit Controls
Check the right panel for the edit options you are offered. These options are categorized as Color Adjustments, Portrait Retouching, Background Adjustments and Crop. Click on each of the menu icons to expand the detailed tools list.
Bottom Menu
Photos in your project are displayed at the bottom of the screen. With the options displayed here you can rate photos, sort and filter them, zoom in/out to check their details, and compare the before/after effects of your edits.
4
Presets
Recommended presets
Evoto provides sets of presets for photographers to edit photos. Click on a preset to preview how it works on the selected photo. The edits are reflected on the right panel for you to check.
Create Preset
You can create your own presets and save them for later use.
Share Preset
a. Right click on a preset to shareb. Click "Share Preset(s)". The Sharing Token is copied automaticallyc. Share the token with others to grant them access
Import presets
a. In Evoto, click the “+” on the upper right corner of the Presets panelb. Click “Import Preset(s)” c. Copy and paste the preset token shared with youd. Click “Import”
5
Batch editing
Sync edits
To edit a series of photos:a. Edit one of themb. Select the restc. Click "Sync" button to apply your edits to them allYou can also "copy" your edits on one photo and "paste" them to the other photo(s).
Apply Presets
Applying a preset to your photos is a good way to improve efficiency.Tip: After importing your photos, click the "Export" button in the upper right corner, then select a preset in the export settings dialog and click "Export".
6
Export
Export Photos
Export photos with the edits you've applied to them. Simply select photos to export and click the "Export" button in the upper right corner. Customize your export settings and click "Export".
Check progress
Beside the "Export" button is the option to click and open up your list of export jobs and check their progress.
Szanujemy twoją prywatność
Odrzuć wszystkoZatwierdź wszystkoZatwierdź wszystko